
Maintaining productivity while doing meetings on Slack along with monitoring user engagements in your WordPress site can drag down your focus. But what if you could connect your Slack with WordPress form(s) on your site? After reading this article, You Can, within minutes!
Forminix Form Builder Plugin has brought to you a quick and easy solution to enhance your overall experience and increase productivity.
Continue reading for further details.
Forminix Presents: The New WordPress Slack Integration
Let us introduce you to the latest development in Forminix, the new WordPress Slack integration module!
With the help of this new feature, you can easily connect your Slack with WordPress form(s) on your website.
Which means, you can now stay updated about your WordPress form without ever leaving your Slack workspace window whenever a user submits them. Cool, isn’t it?
In short, WordPress Slack integration allows you to,
- Receive customized notification alert from your WordPress to Slack channel whenever a form submission takes place.
- Add any form field value directly inside custom notification message with the help of shortcodes.
- Configure multiple forms to get individual notification alerts in Slack workspace.
In this tutorial, we will be showing you how you can easily connect your Slack with WordPress form(s) by following some quick steps.
So, without any further due, let’s get right into it.
NOTE: Before we get started it is recommended that you update your existing Forminix plugin to the latest version. However, if you haven't downloaded the plugin yet, you can either,
checkout the various pricing plans from here or download the free version from here.
Connecting Slack with WordPress Forms in Forminix
Before we begin, if you haven’t yet started off with Slack then we recommend creating an account and preparing your workspace.
If you already are in Slack, then log into your account and continue following the instructions below.
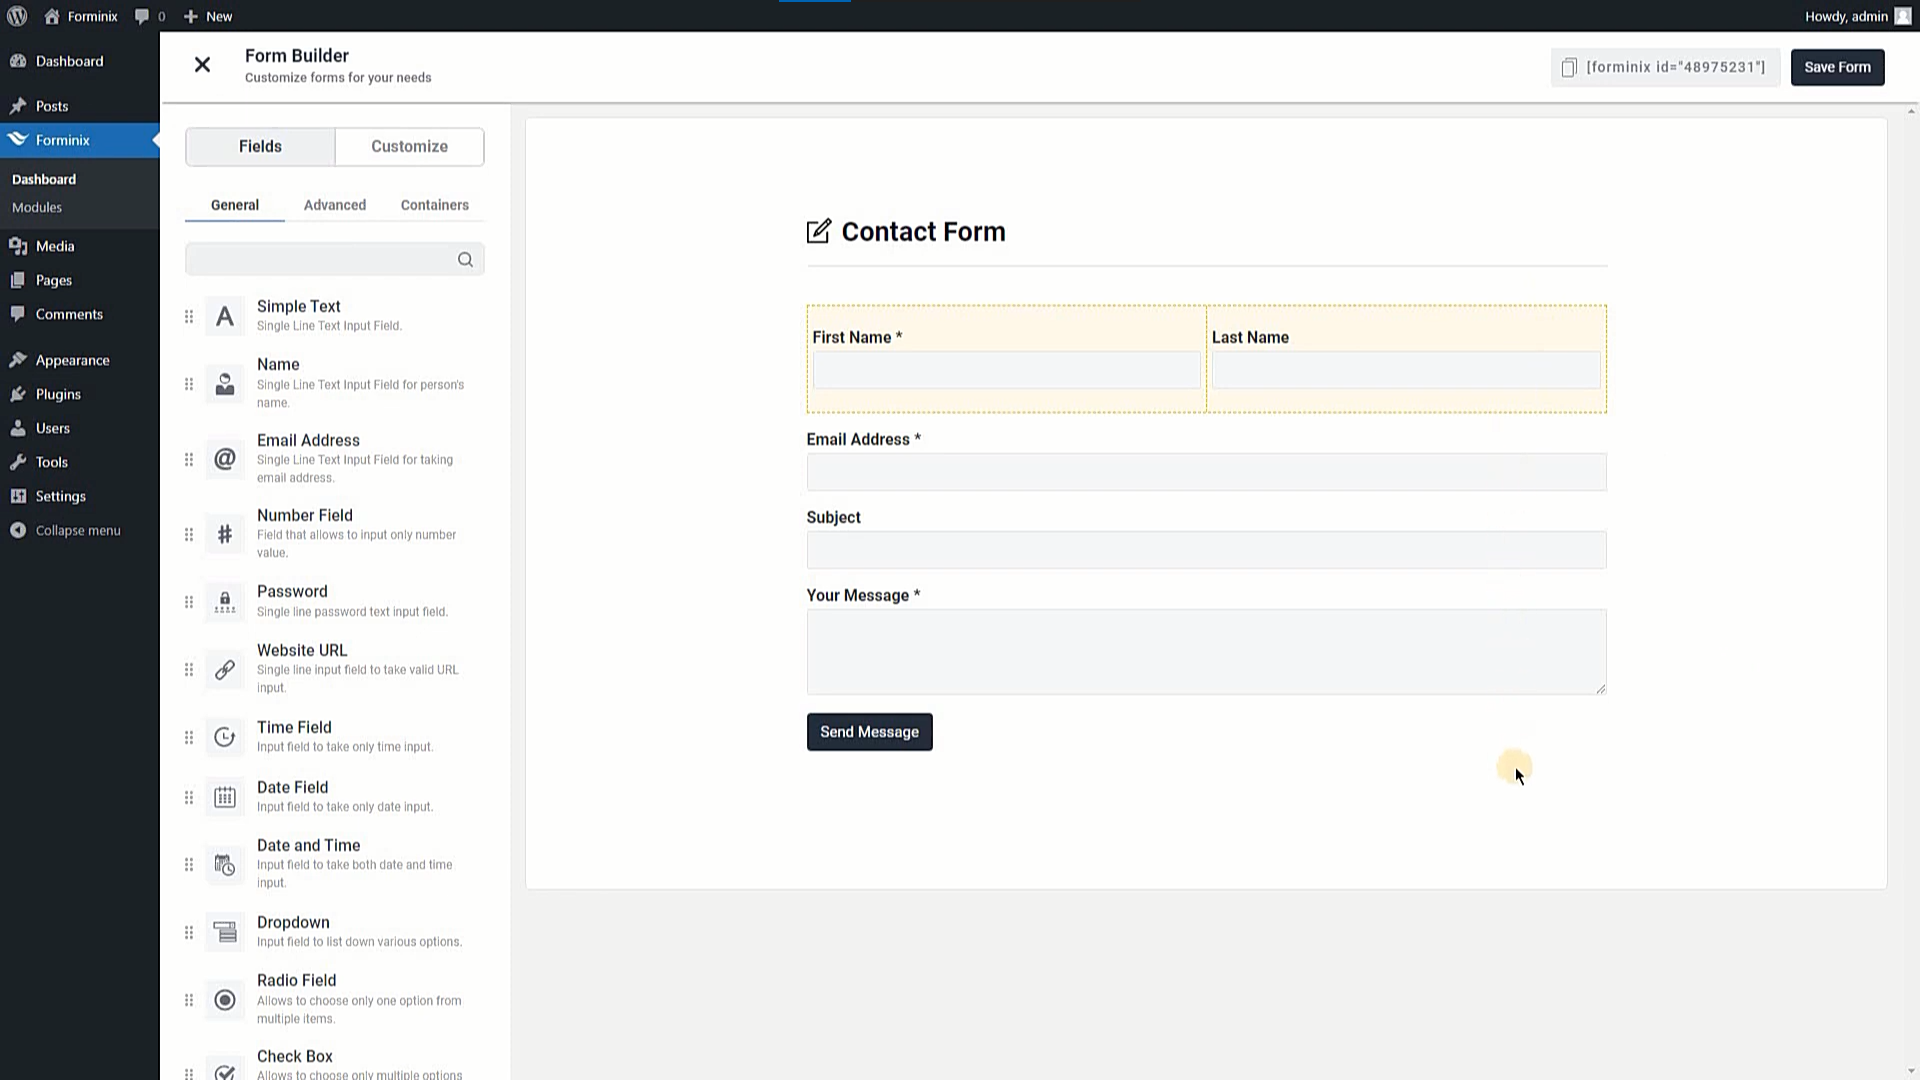
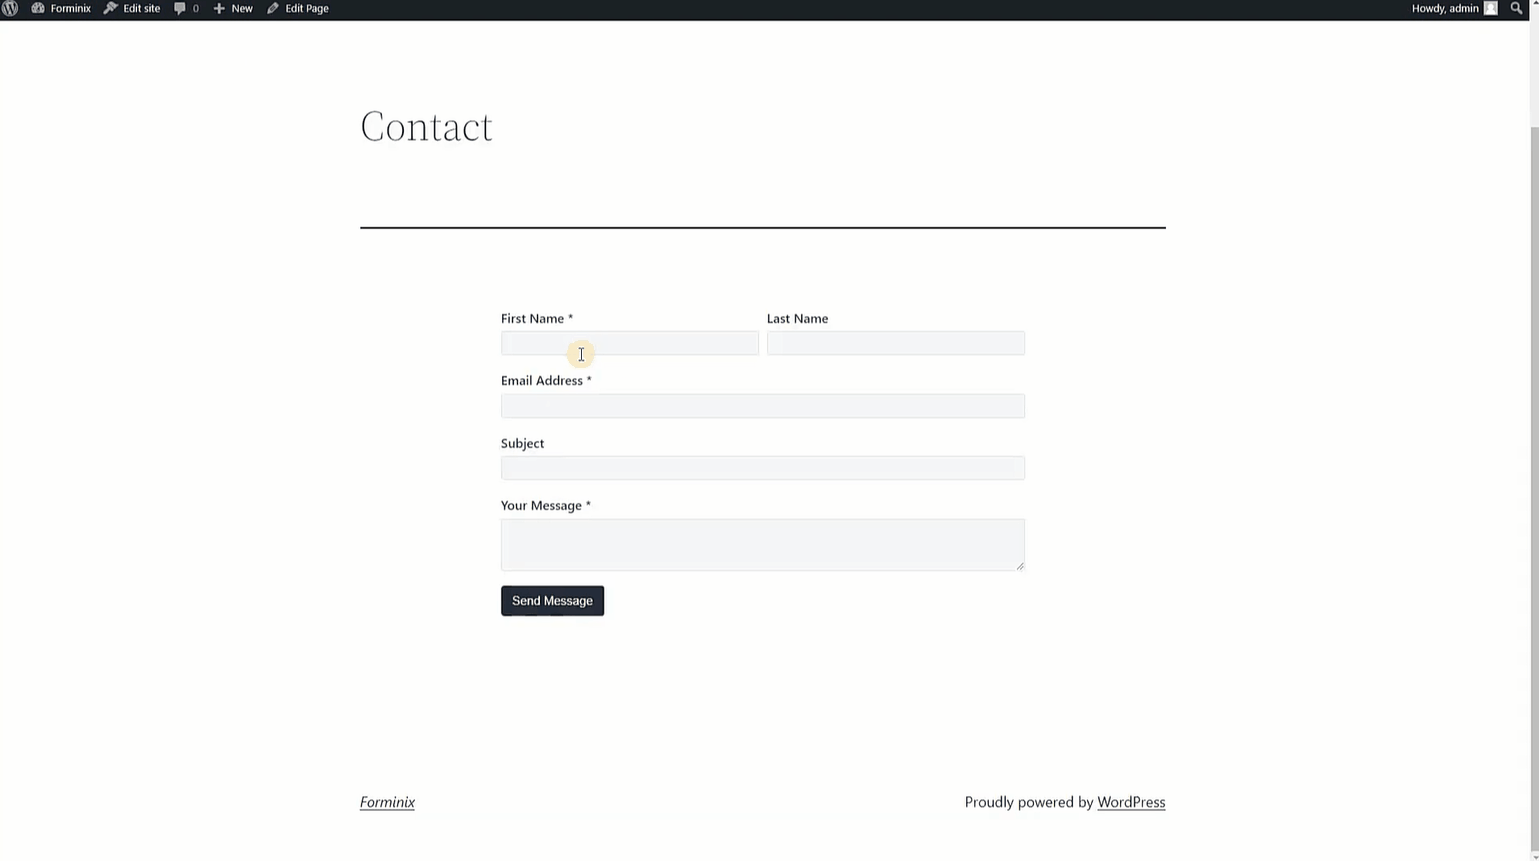
For this tutorial we have created a custom contact form to receive notification from WordPress to Slack channel when submitted.
But your form can be different than this one, you can create and use any sort of form you want.
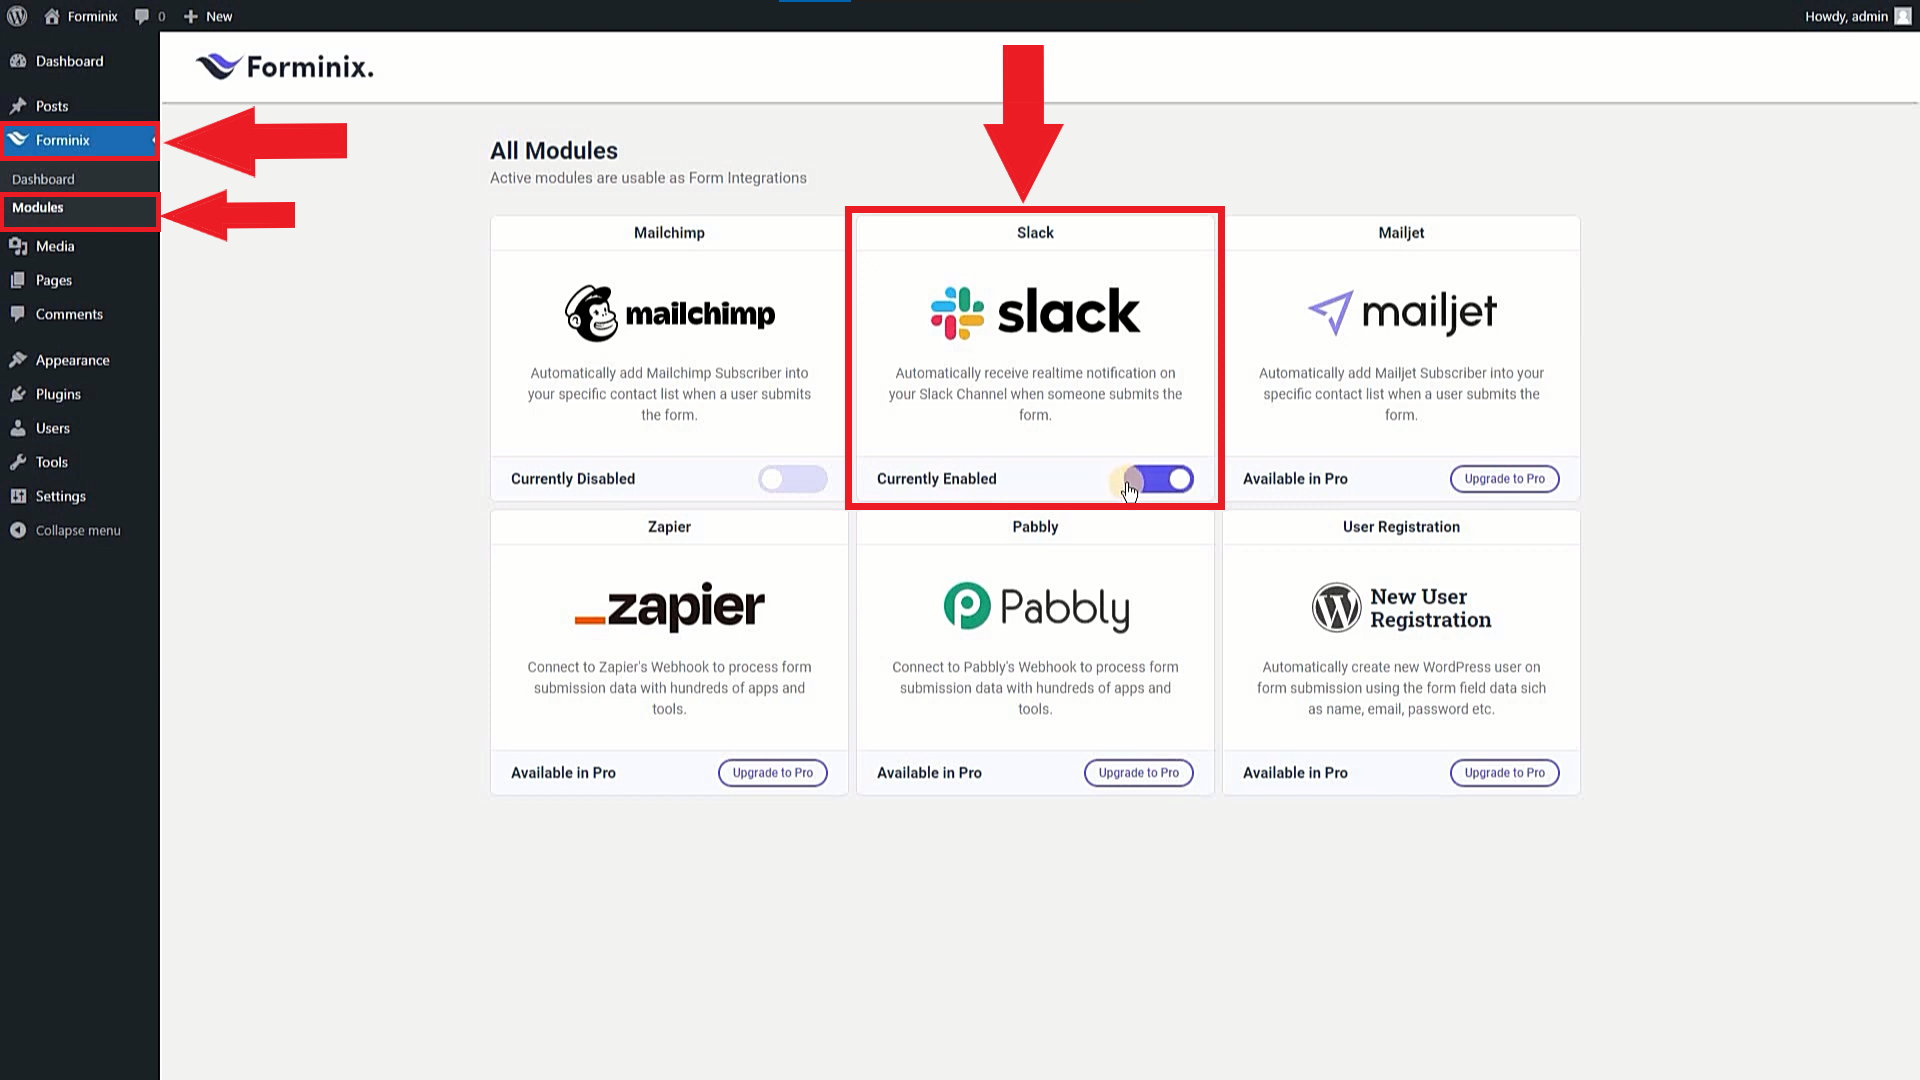
Step 1: Enable WordPress Slack Integration
Go to your WordPress admin panel and navigate to the Forminix “Modules” menu. From there you have to enable the Slack integration toggle.
Step 2: Add Slack Integration inside Form Settings
Now, go to the form’s settings page and navigate to the “Integrations” tab as shown below.
Then you will see the “Add Integration” button down below. Click the button and a popup will show up. From there, select the newly enabled “Slack” integration. You can then get access to the “Slack Notification” panel.
Step 3: Add Webhook URL and Notification Message
Here, inside the “Slack Notification” panel there are two fields. They are, “WebHook URL” and “Notification Message“. You have to configure them both.
Webhook URL:
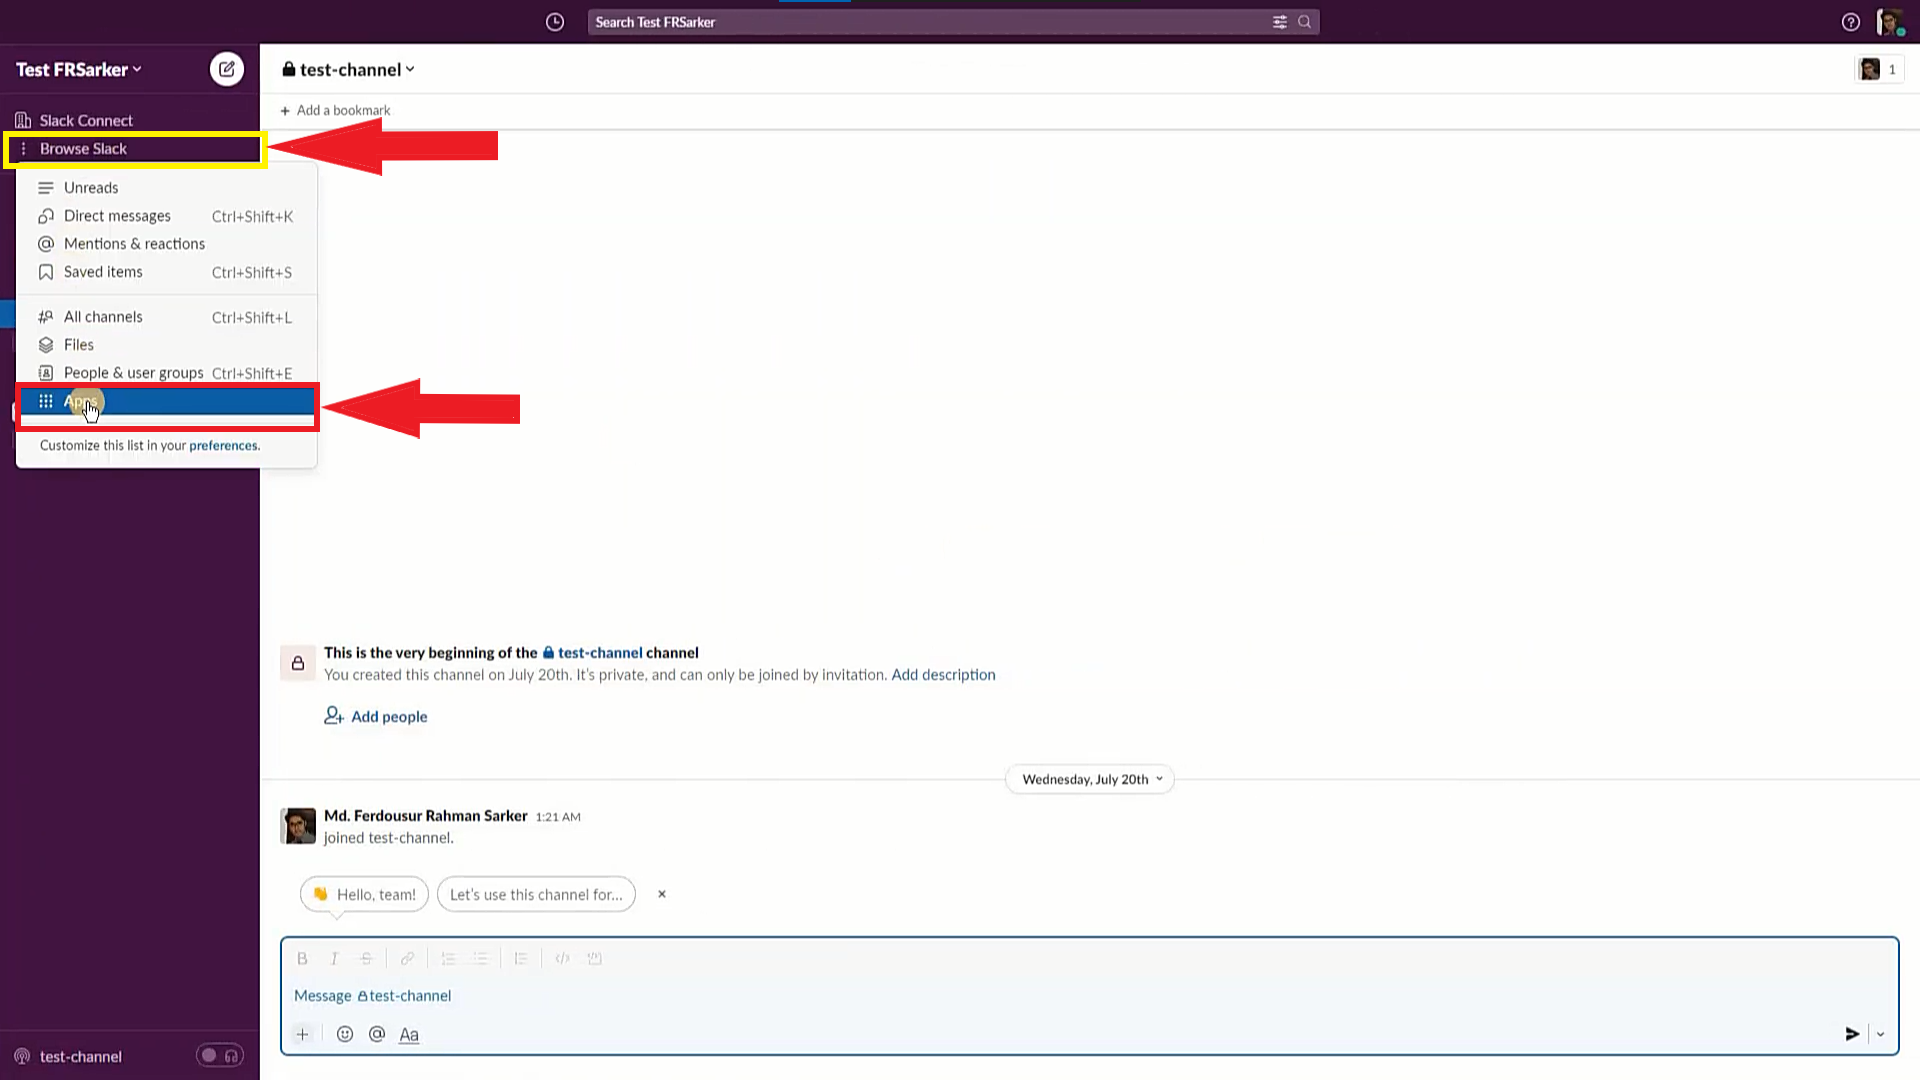
In this field you have to provide the Webhook URL of your Slack workspace. Now, to get the URL, go to your Slack workspace and click on the “Browse Slack” option on the sidebar and navigate to the “Apps” page.
Then, search for “WebHooks” in the search bar and click on the “Add” button of the “Incoming WebHooks” app from the search results as shown below.

Then on the next page, click on the “Add to Slack” button. Afterwards, from the “Post to Channel” section, choose your desired Slack channel where you want to receive message when someone submits your form.
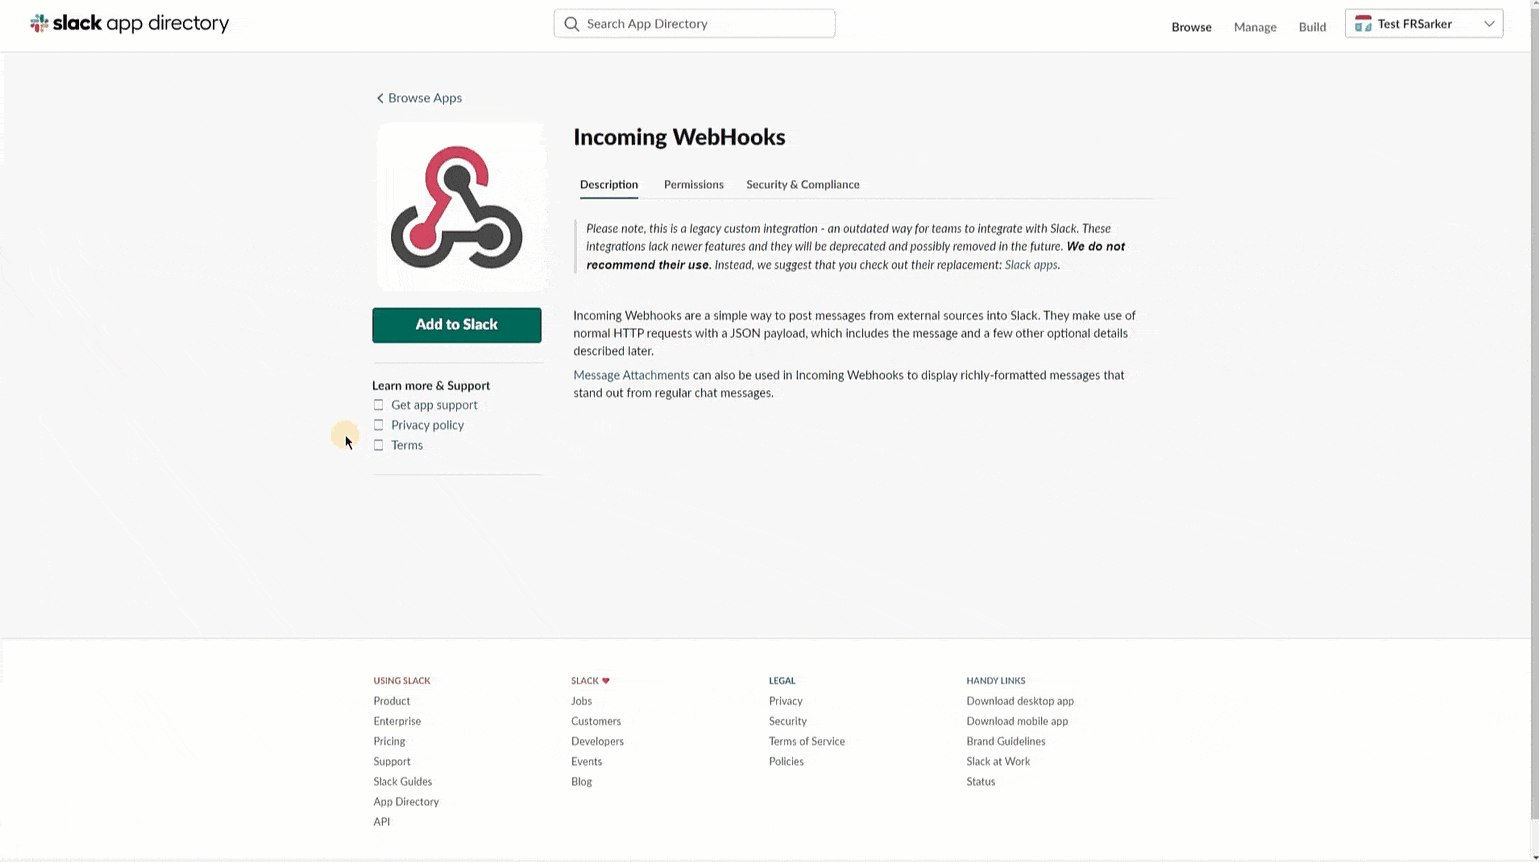
After selecting your channel, click on the “Add Incoming WebHooks Integration” button. Finally on the next page you will see your WebHook URL. Simply copy and paste it in the “Webhook URL” field of Forminix.
Notification Message:
In this section you can set your own custom notification message that will be sent from your WordPress to Slack channel when a form is submitted.
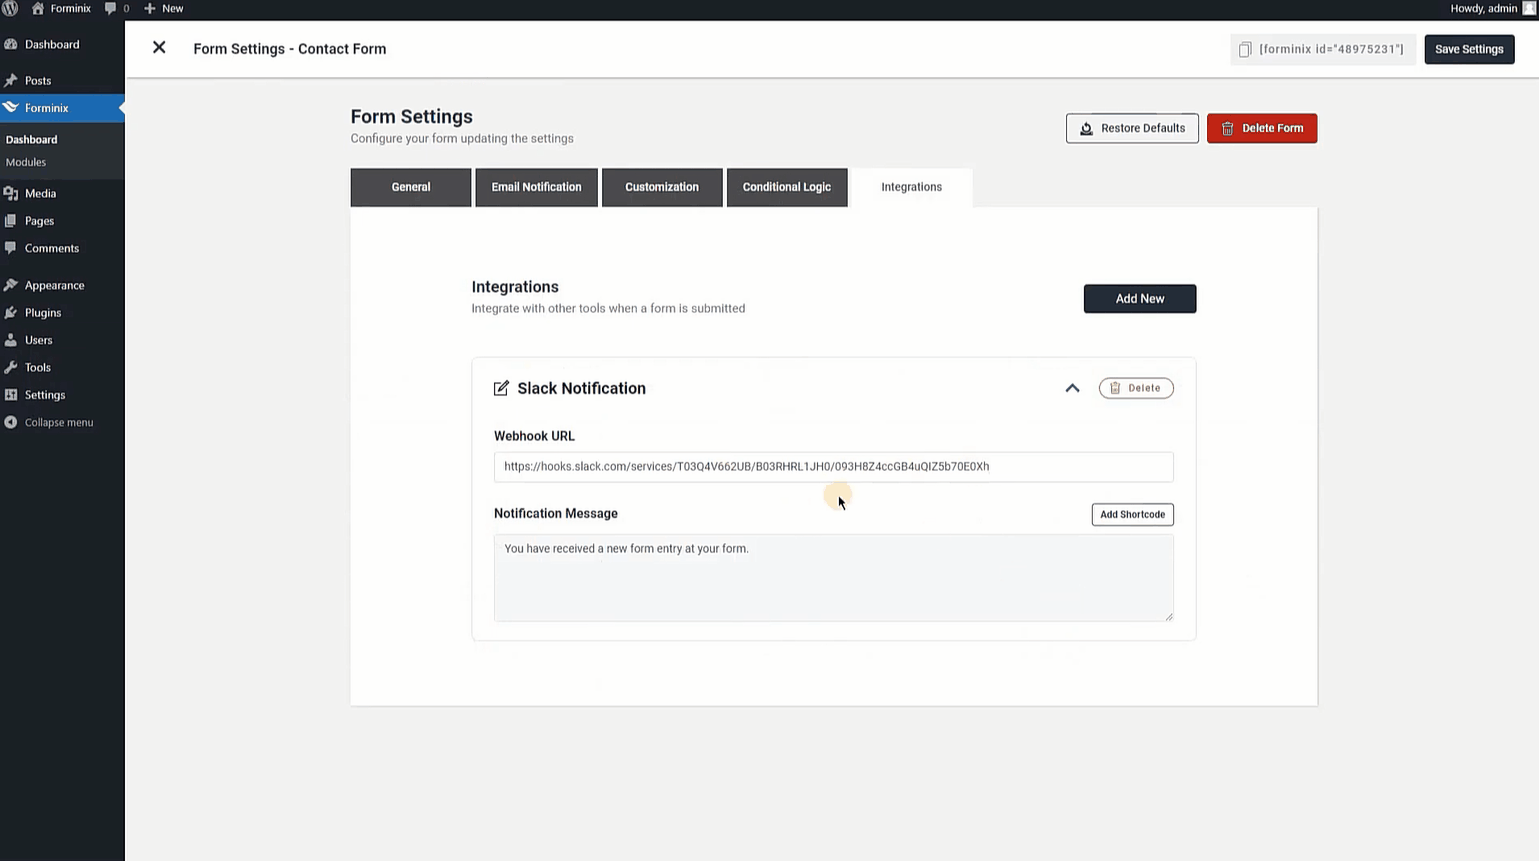
On the other hand, you can also show field value directly in your message by adding a shortcode of that form field. Just click on the “Add Shortcode” button and choose the field you want.
Here, we have picked the “First Name*” field so when we get notified in our Slack channel, we can see the name of the user who submitted the form.
Step 4: Save All Settings and Test Your WordPress Slack Integration
Finally, after following all the previous steps correctly, save your setup by clicking the “Save Settings” button the top right corner of your Forminix page.
After that, start testing your WordPress Slack integration. Try filling up and submitting a form. Then, go and check your selected Slack channel, you should get notified with your custom notification message as shown below.
If you encounter any issue, recheck all the previous steps and check whether there has been any mistake. Correct the mistakes and try again.
So, now you know how to connect your Slack with WordPress form(s) in few simple steps.
Conclusion
In this tutorial we have showed you all the necessary steps required to connect your Slack with WordPress form(s) on your website.
Join your Slack workspace to your WordPress forms with the help of this powerful Forminix integration.
As a matter of fact, keeping an eye on your user engagements with your forms while working in Slack workspace is now a matter of clicks. All thanks to Forminix Form Builder’s latest feature.
So, what are you waiting for? Start increasing your productivity and never miss an update of your WordPress form submissions from today.
Last but not the least, please leave your comments down below. Got any suggestions? You are most welcome to Share them as well.
Until next time, Take Care.


