
If you have your HubSpot service up and running and want to connect it to your WordPress site, then you are in for a treat today. Because by end of this article you will be able to easily connect your HubSpot with WordPress form(s) on your website.
In this tutorial we are going to show you a hassle-free way to add subscribers from your WordPress to HubSpot contact list with the help of Forminix Form Builder Plugin.
So, stay tuned till the end for all the details.
HubSpot: A Smart and Powerful CRM Platform for Your Business
Frankly speaking, HubSpot comes in as an all-in-one solution for the overall growth of your business.
Whether you want to do email marketing, automation, or make websites, create engaging blog contents or enhance your inbound marketing strategy, HubSpot got you covered.
What’s more interesting is that it houses various set of powerful tools to manage and merge your marketing and sales department on a dashboard. Cool, isn’t it?
Track and nurture your leads and turn them into customers in one place. And eventually experience a good boost the ROI for your company.
Some of it’s notable features include,
- A free and super intuitive CRM for the sales team for managing customers.
- Powerful Content Management System (CMS) for managing and optimizing contents.
- SEO and content strategy tool so ranking webpages and blogs.
- Marketing automation tool for email automation, tracking and optimization.
- Social Media tool for measuring ROI and publishing blogs on various platforms.
With all being said, Forminix Form Builder Plugin now introduces with their new update, a super easy way to connect your HubSpot with WordPress forms in less than 2 minutes.
More about it shortly.
WordPress HubSpot Integration: The New Forminix Module
With the latest update, Forminix Form Builder plugin has brought to you a new feature tool called the WordPress HubSpot Integration.
As you might have guessed, this integration enables you to easily connect your HubSpot with WordPress form(s) on your website.
Which means, a better and efficient way to collect subscribers from WordPress to HubSpot contact list through form submission.
We are going to show you all steps necessary for completing your integration setup.
So, let’s dive right in.
NOTE: Before we begin, it is recommended that you update your existing Forminix plugin to the latest version. However, if you do not have the plugin installed yet, you can
check out the pricing plans from here and download.
5 Simple Steps to Connect HubSpot with WordPress Form in Forminix
Before we get down to the detailed process, it is recommended that you have your HubSpot service up and running.
Do not worry if you don’t have any HubSpot account yet, you can simply check out this guide on how to set up your HubSpot account. Then simply go to this signup page (free) and complete your setup.
Other than that, if you already have a HubSpot account, just sign in and continue following the instructions bellow.
Here, for this tutorial we have created a custom contact form. What we are going to do with it is, collect different user inputs and send them from WordPress to HubSpot contact list with every submission.
These collected user inputs will be used as their profile information in our contact list.
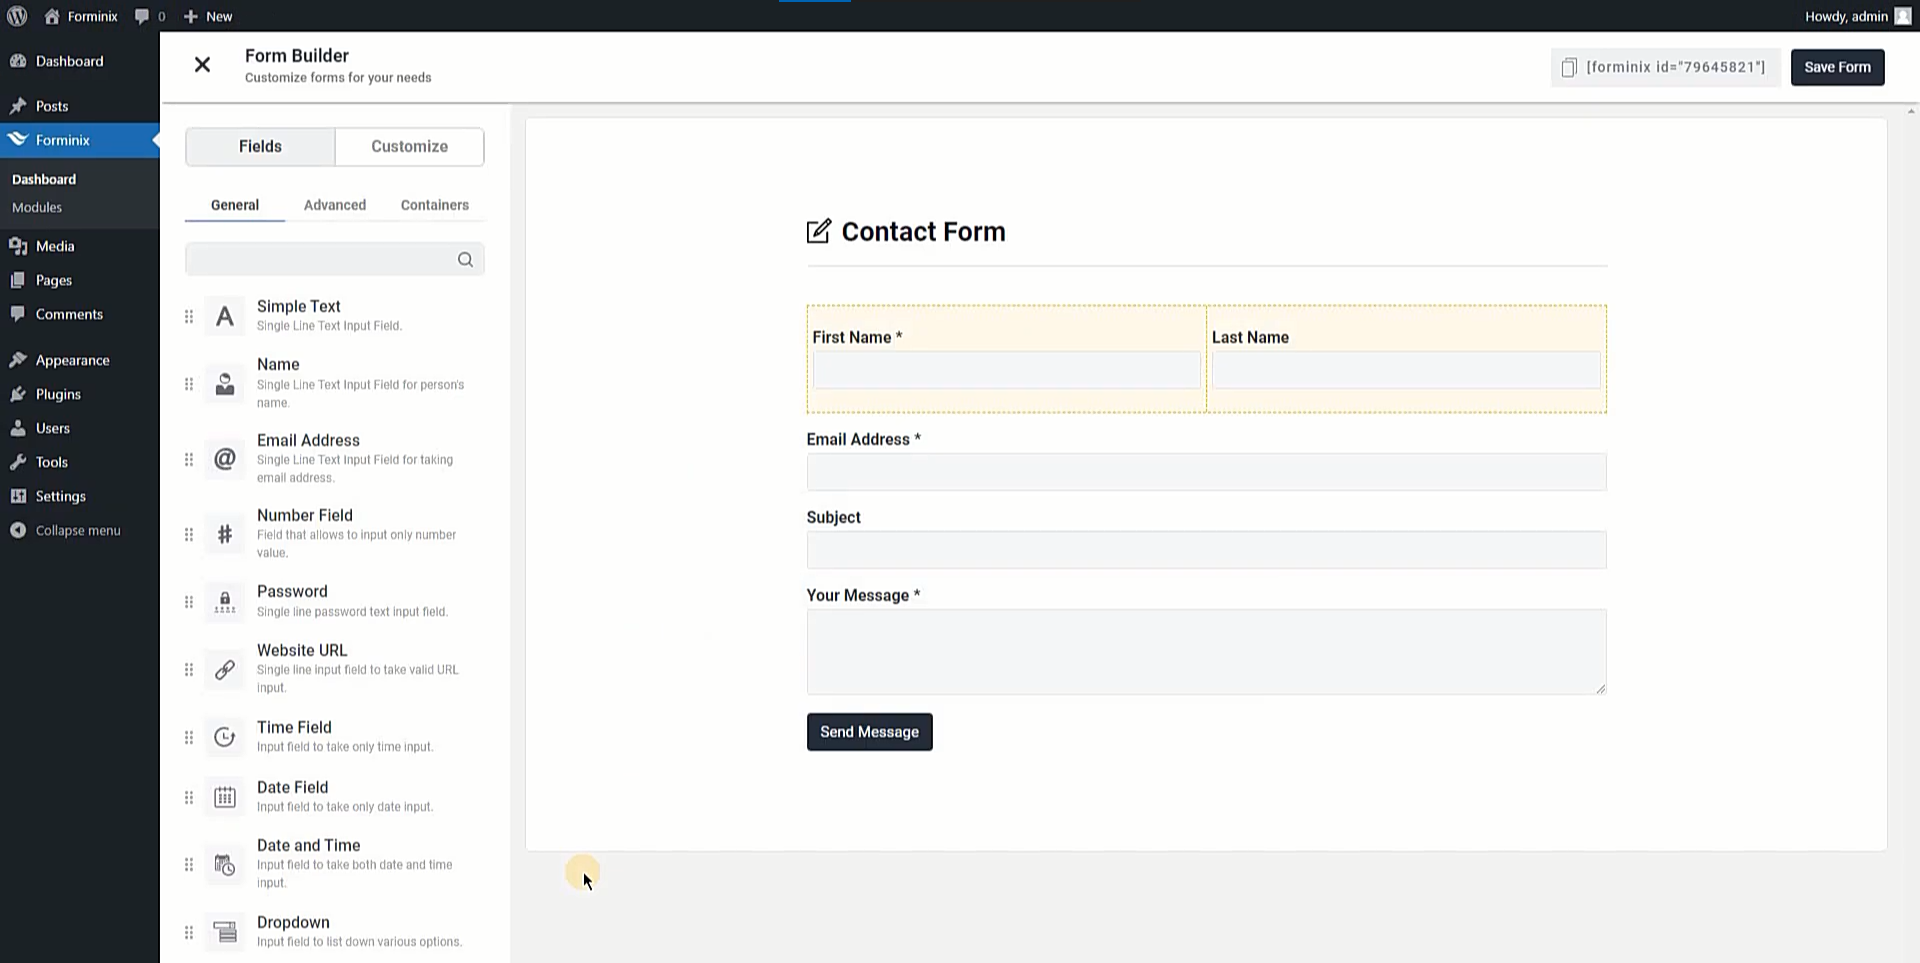
You can build any sort of form based on your need. And also collect any form field data you deem necessary for creating subscriber profiles in your HubSpot contact list.
Step 1: Enable the WordPress HubSpot Integration
Firstly, we have to enable the HubSpot integration. To do that, simply go to the Forminix “Modules” menu on your WordPress admin panel.
Then search for the HubSpot integration toggle and enable it with a click (as shown below).

Step 2: Add Integration in Form Settings
Now, go to your form settings page and navigate to the “Integrations” tab on the top right side.
Then, on the next page you will see the “Add Integration” button at the bottom of the screen. Click on it and a popup will show up. From there, select the newly enabled “HubSpot” integration.
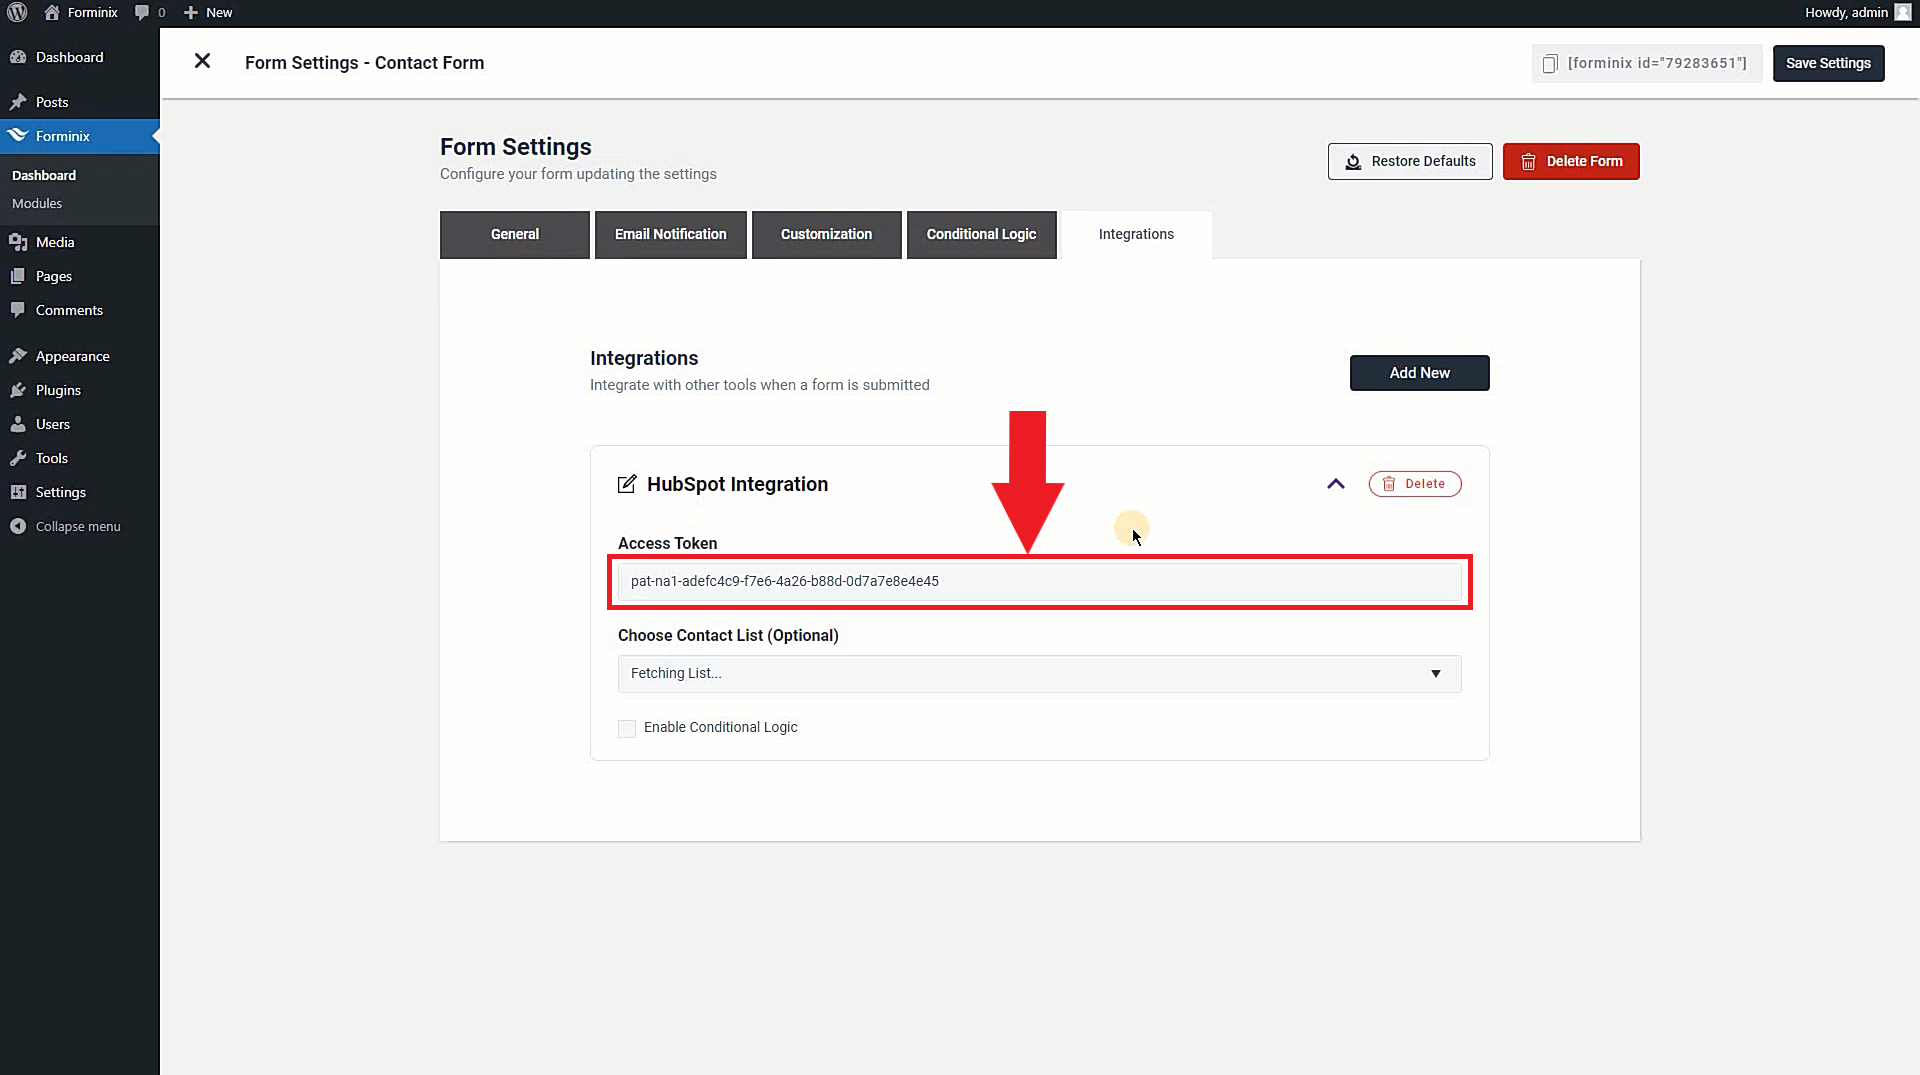
Step 3: Add HubSpot Access Token and Contact List
Inside the “HubSpot Integration” panel, there are two fields. One is the “Access Token” field and the other one is “Choose Contact List” field.
Now, let’s get to know about these fields in details and fill them up.
Access Token:
Access token is a special key that connects your HubSpot with WordPress form. So, it is a prerequisite for being able to send subscribers from WordPress to HubSpot contact list. First and foremost, you have to create a private app in your HubSpot account.
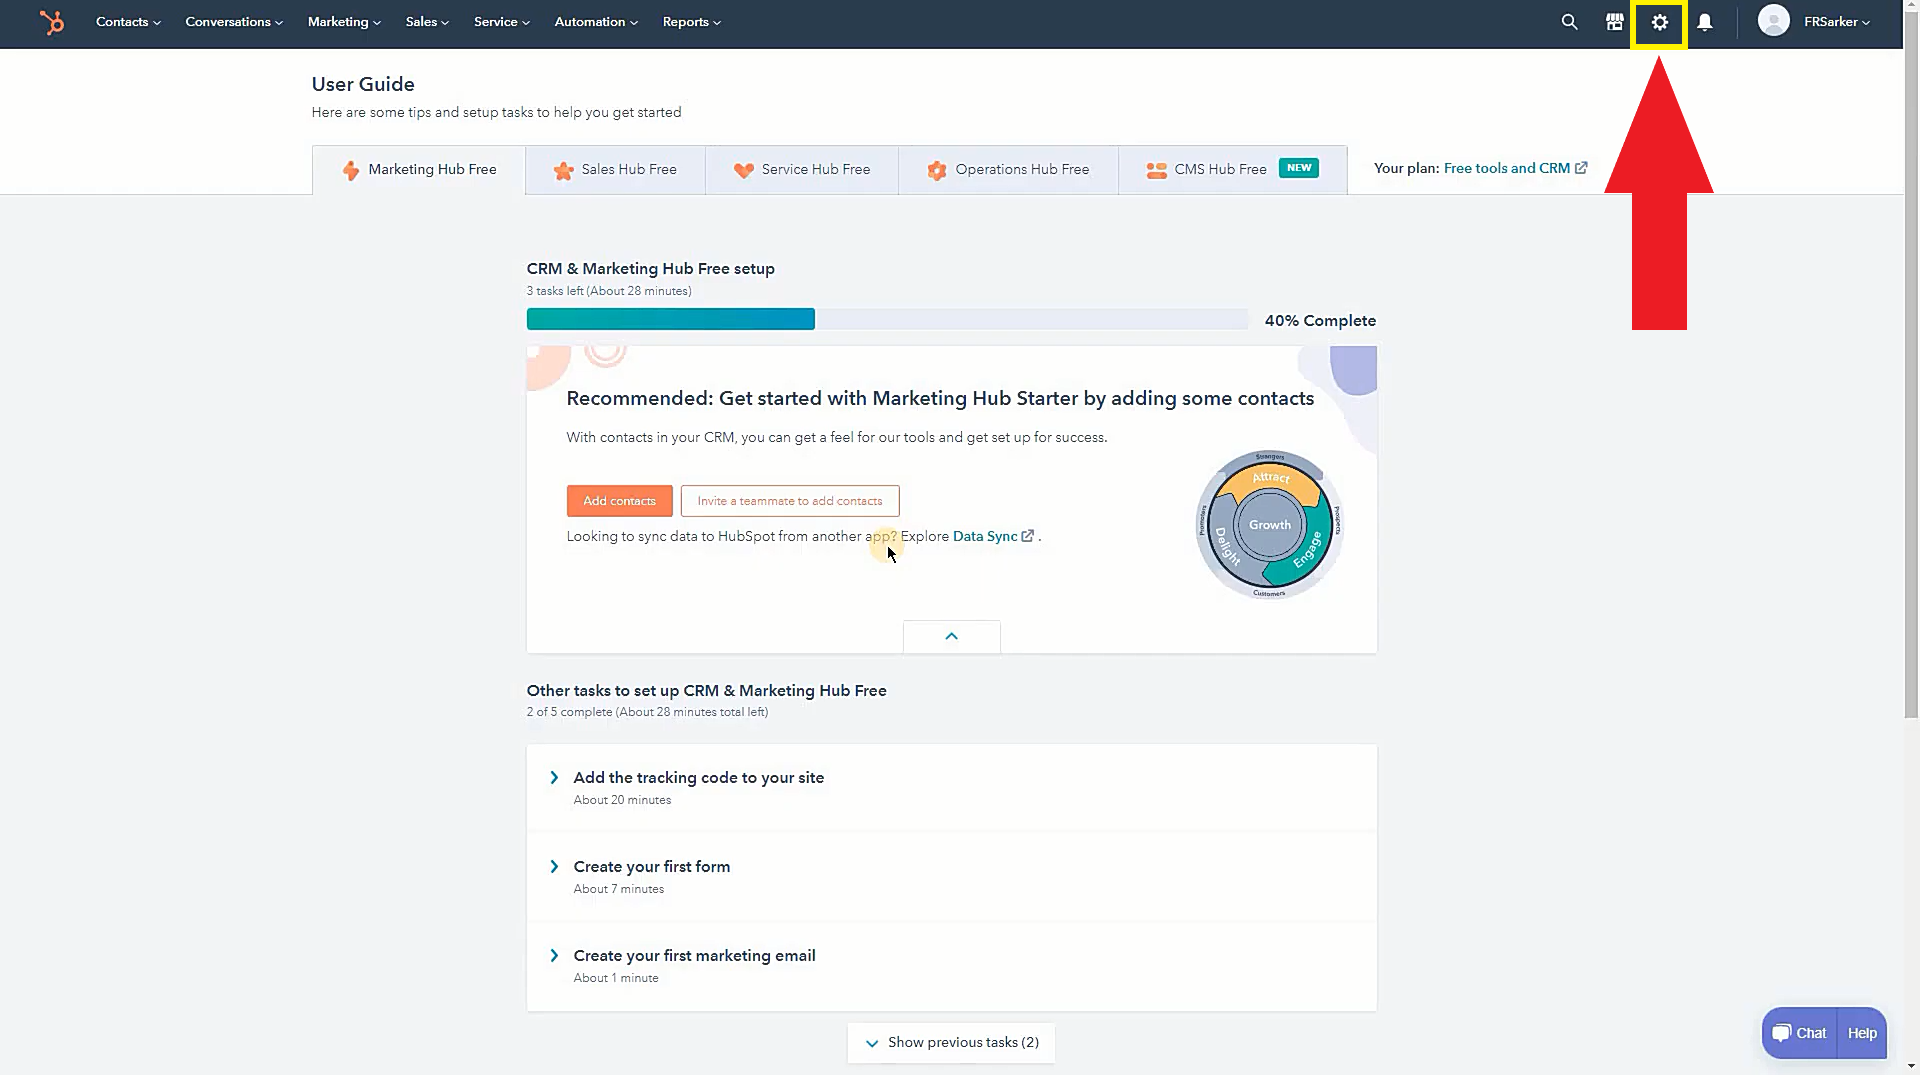
Now, to get the access token, simply go to your HubSpot dashboard and click on the settings option on the top bar (as shown below).
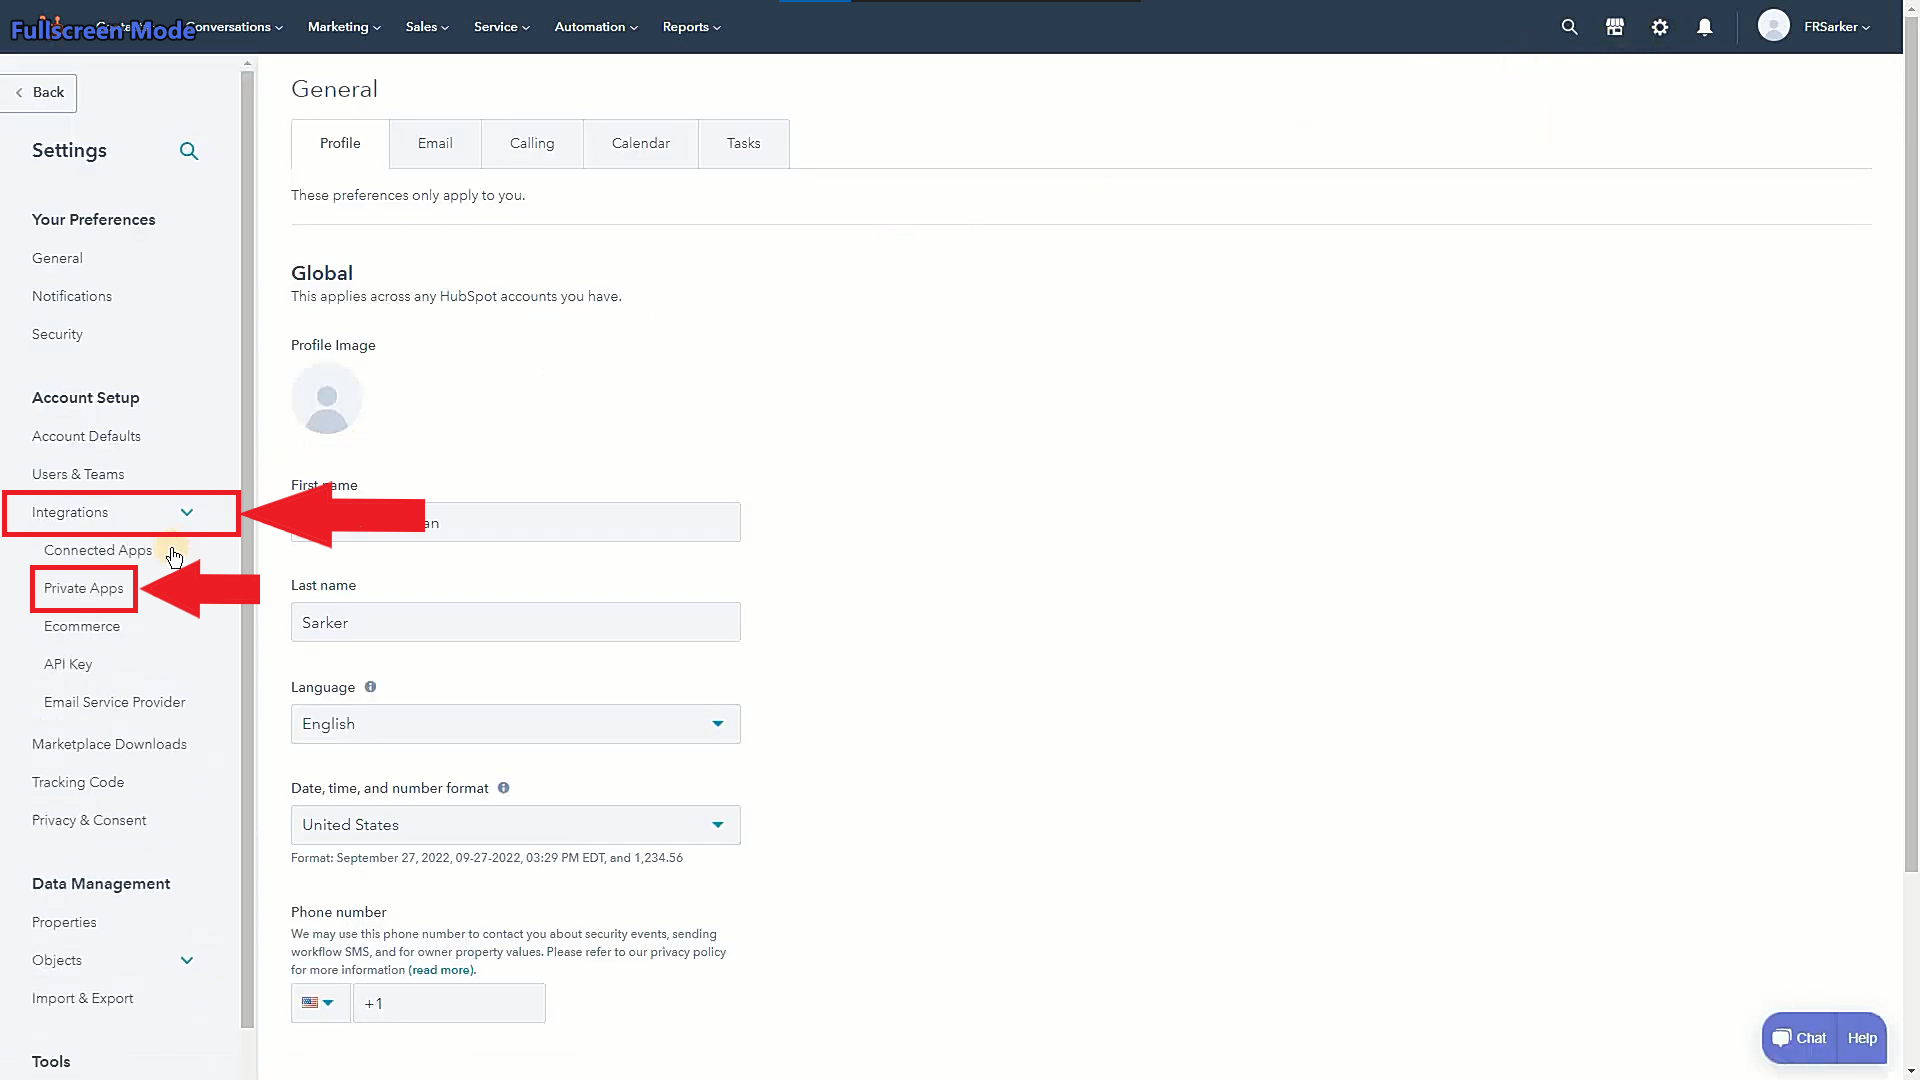
On the next page, click on the “Private Apps” option from the dropdown menu under the “Integrations” tab from the panel on the left.
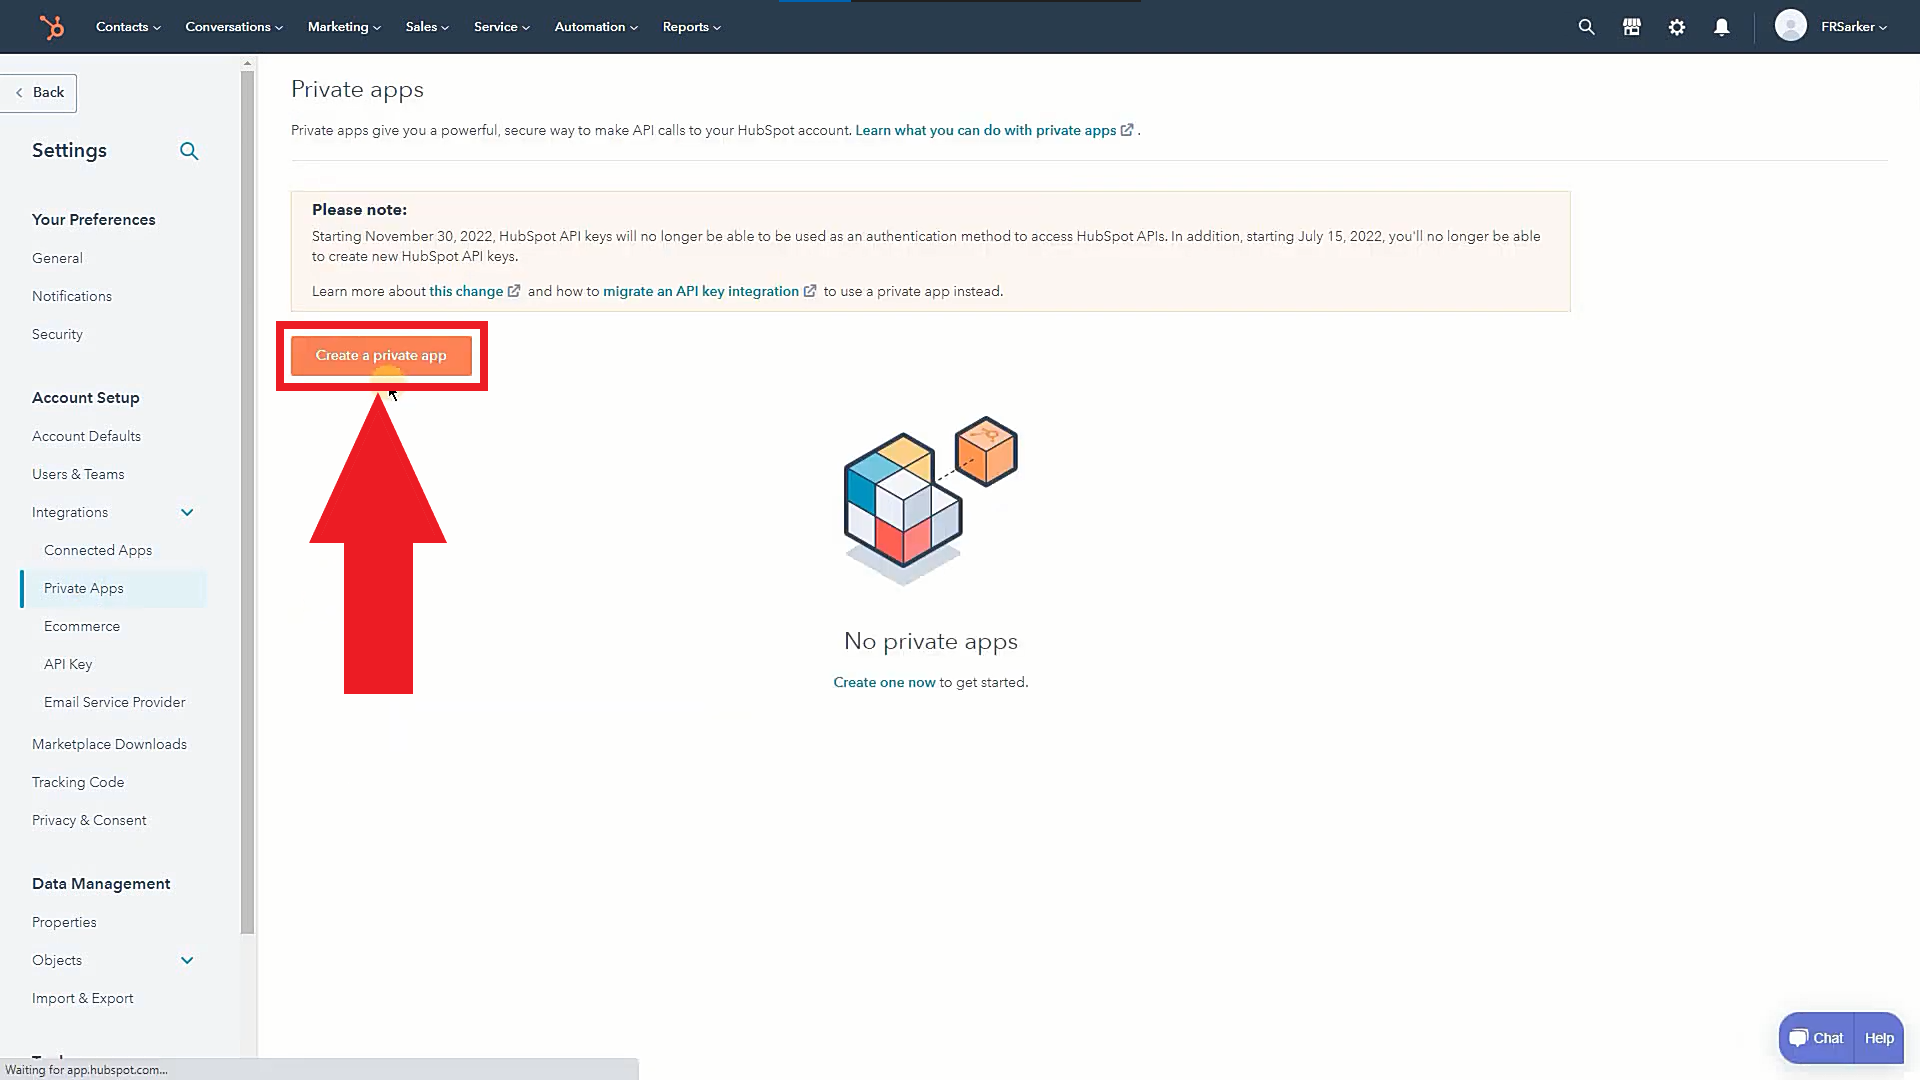
Then, on the “Private Apps” page, click on the private apps button (as shown below).
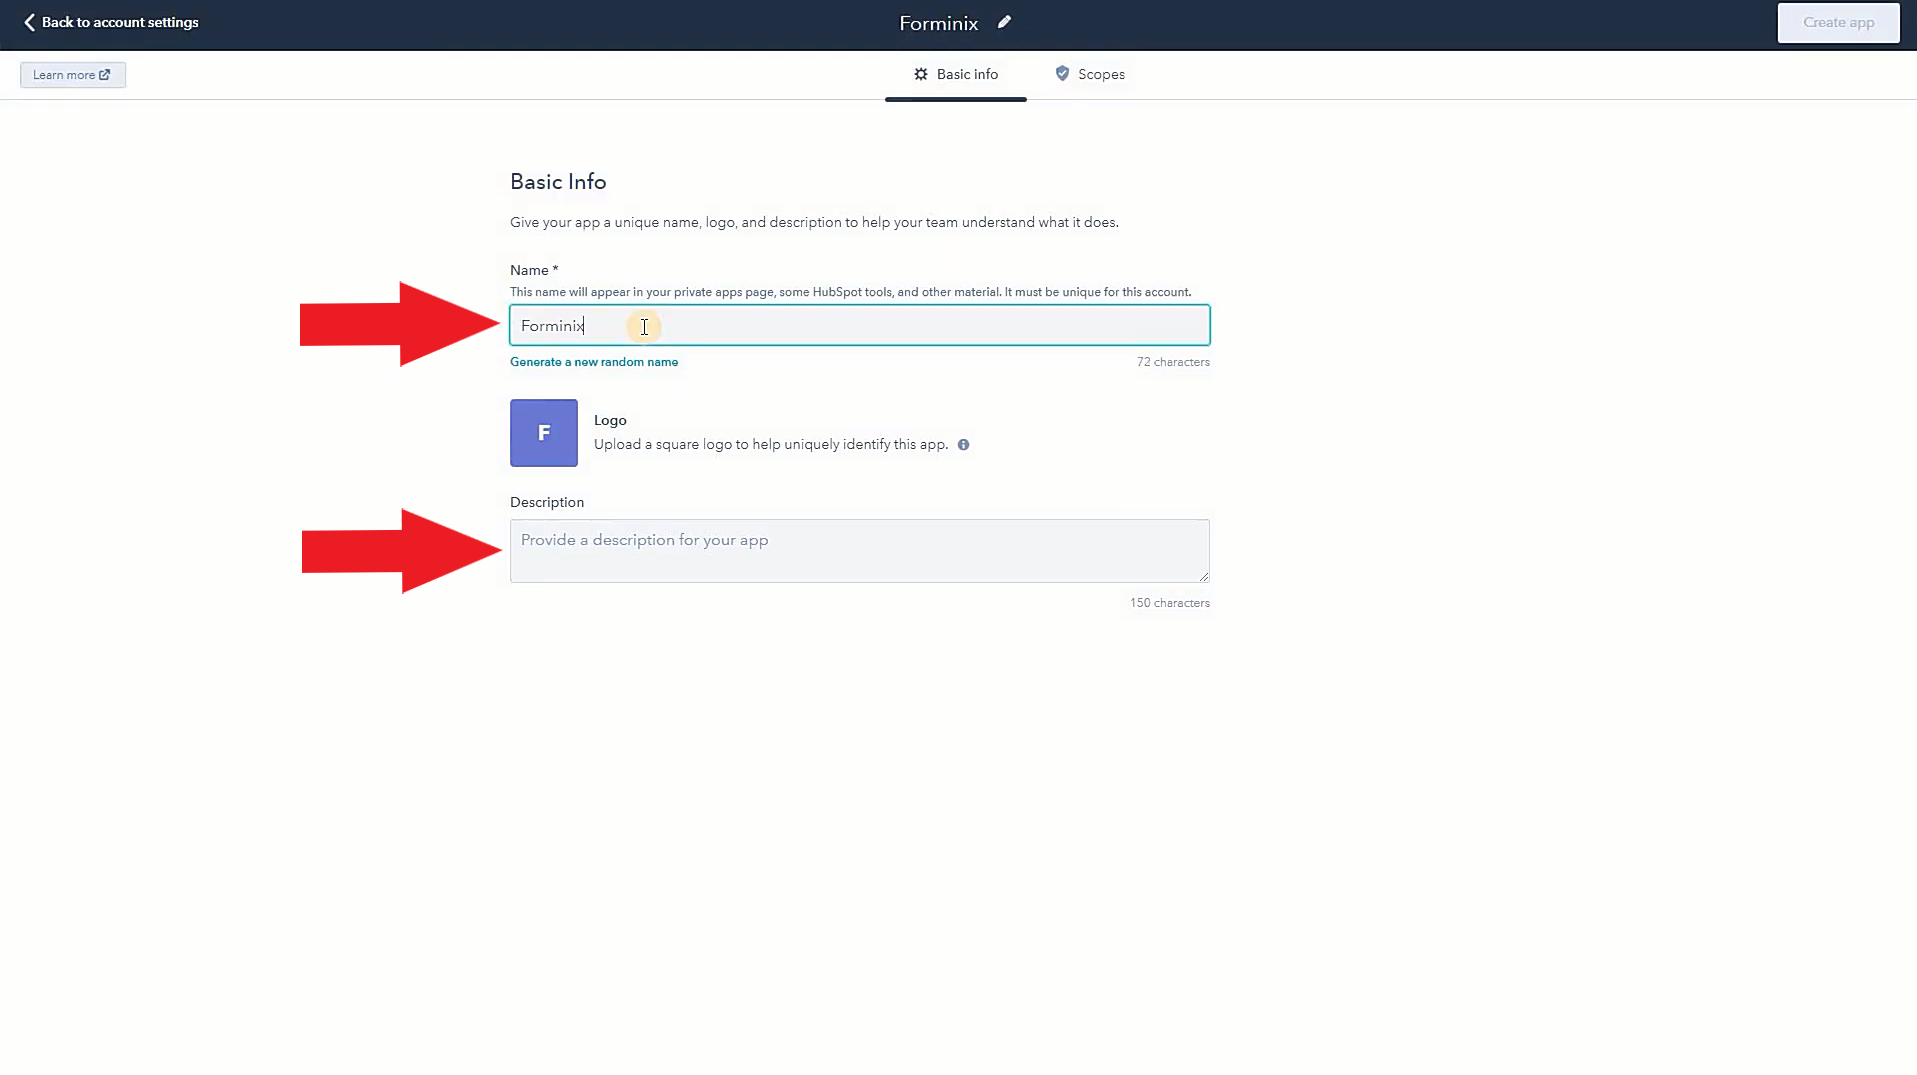
After that, a new window will appear where you have to set a name for your new private app. Besides, you can also add a logo and description of your app if you want (optional).
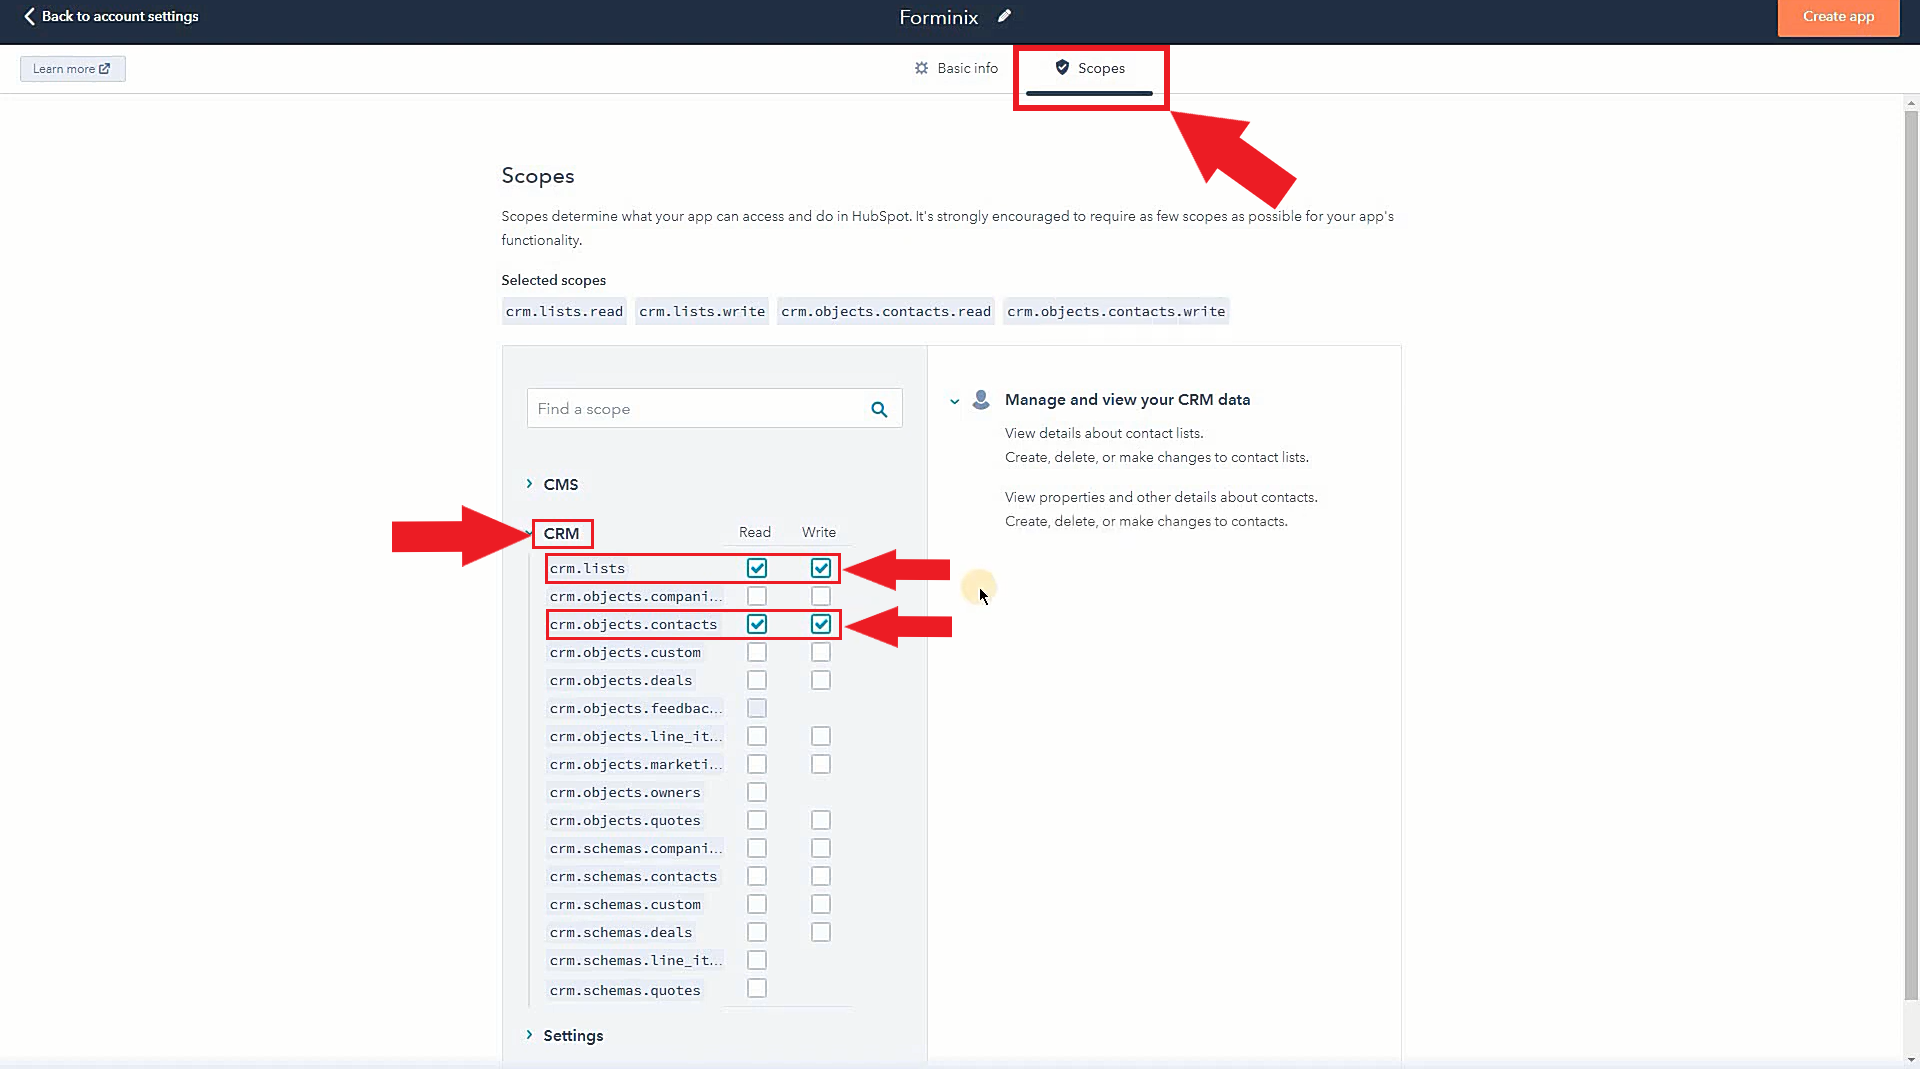
Then, from the top bar, navigate to “Scopes” tab and provide read and right permission to “crm.lists” and “crm.objects.contacts” in the “CRM” dropdown menu (as shown below).
Now, after all the previous steps, finally click on the “Create app” button on the top right corner.
A short popup will appear. From there, simply click on the “Continue creating” button and your private app will be created.
Simply copy the access token from the popup and place it in the respective field in HubSpot integration panel (as shown below). It is one of the most important steps in the process of connecting HubSpot with WordPress form.
NOTE: Easily enable the conditional logic option at the bottom of the panel if you require.
Choose Contact List:
Here you can select your preferred contact list where your subscribers/users will be added from WordPress to HubSpot account.
Right after inserting the access token, Forminix will quickly fetch and show you all the contact lists of your HubSpot account.
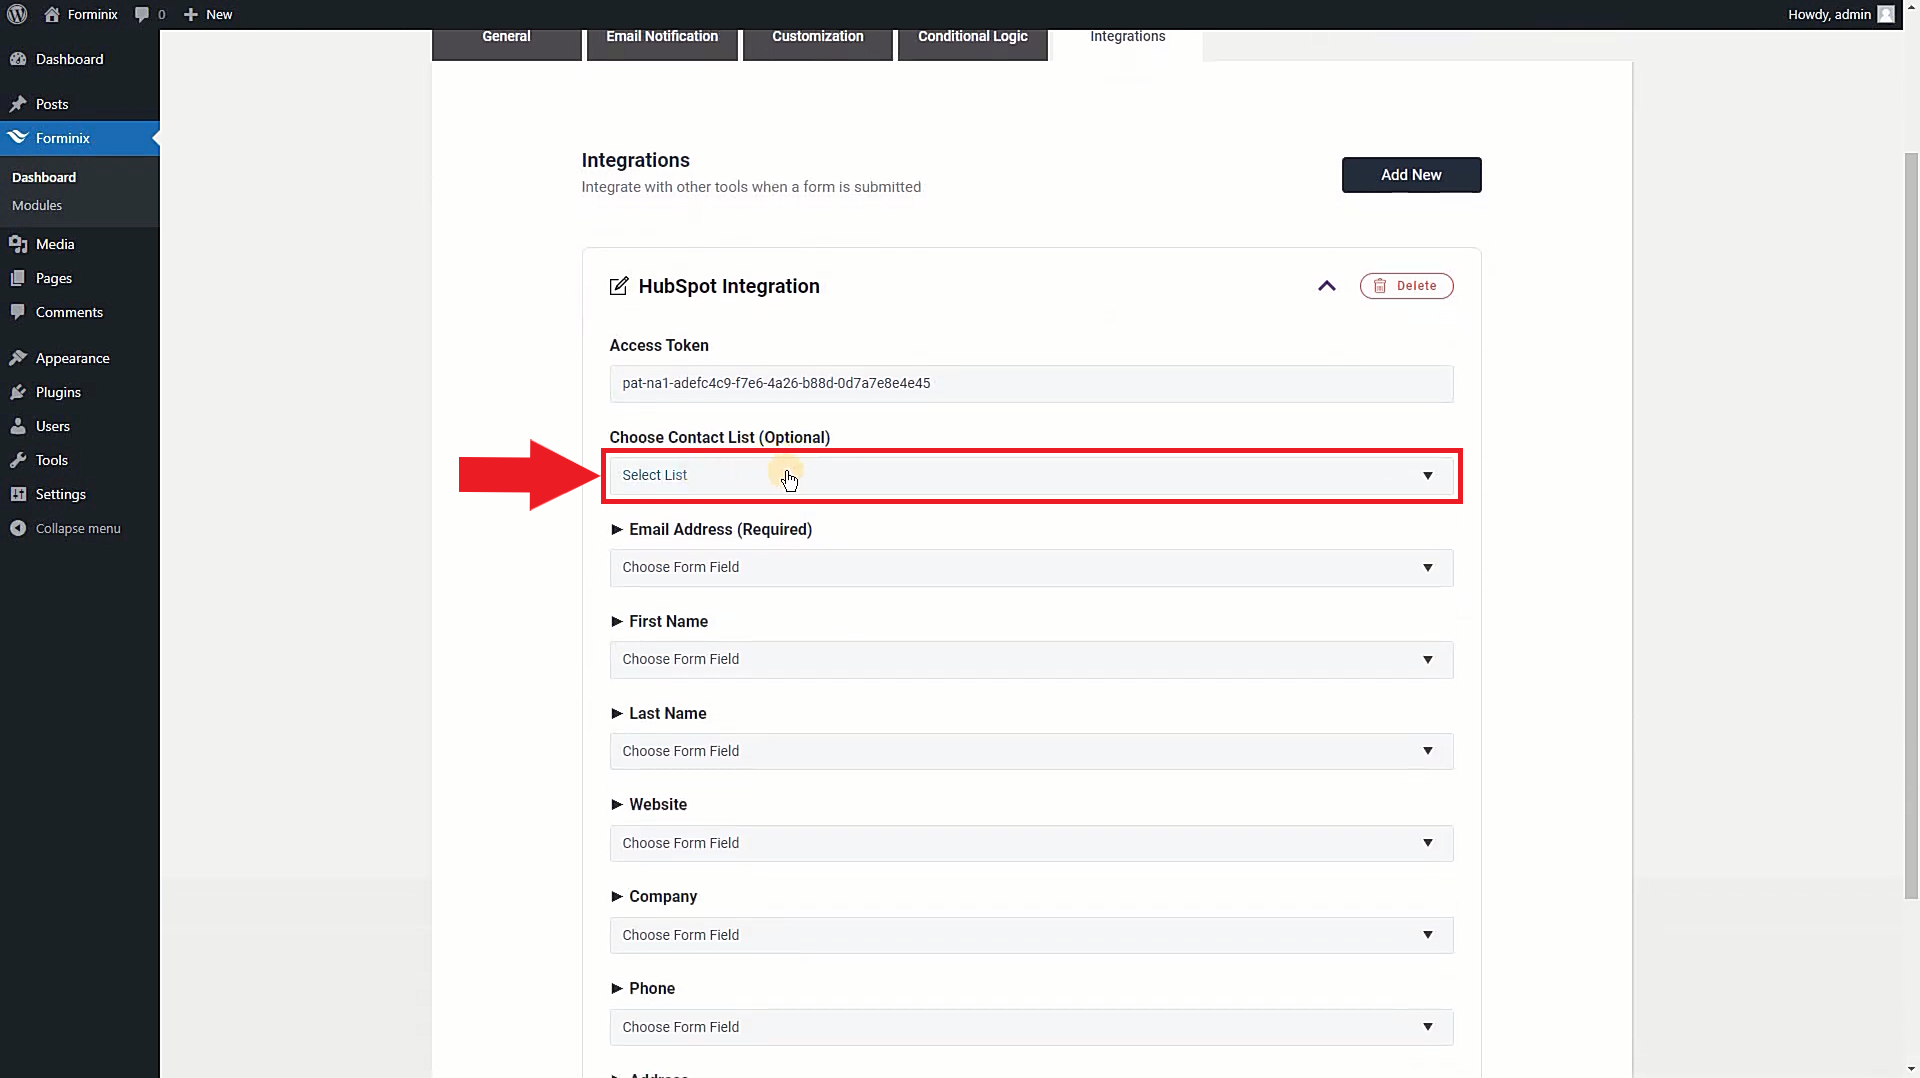
So, choose a contact list from the dropdown menu on this field to connect your HubSpot with WordPress form.
Step 4: Map Form Fields for HubSpot User Profile
We are almost finishing up! After you are done doing all the previous steps and setups, you now have to map the form fields.
It is a necessary step because, the mapped fields will help create the subscriber profile info that we are sending from WordPress to HubSpot contact list.

For this tutorial we have picked the “Email Address” field as the HubSpot subscriber’s email address, “First Name” field as their first name and “Last Name” field as their last name.
Step 5: Save All Settings and Test WordPress HubSpot Integration
And now, to finish up the whole setup you have to save the settings that you have made so far. So, simply click on the “Save Settings” option on the top right corner in Forminix plugin page.
Now, the test run. Let’s see whether everything is working as expected or not.
Fantastic! Our new HubSpot integration is working properly!
Now, to see the subscriber profiles in your selected contact list, navigate to the “Contacts” option at the top left side on the menu bar of your HubSpot dashboard (as shown above).
Here, you will find all the users and the mapped form field information in the contact list.
Mind that, if you face any error with the outputs, simply recheck all the previous steps and look if for any mistake. Fix that and test again, you should be good to go.
So, now you know how to connect your HubSpot with WordPress form in Forminix Form Builder.
Conclusion
In this tutorial we have tried and covered and show you all the necessary steps to connect your HubSpot with WordPress form(s). The entire process is easy to follow and will not take much time to finish.
Hopefully this article has served its purpose. Grow your HubSpot contact lists more quickly and efficiently now through simple form submissions on your WordPress site.
In fact, the latest HubSpot integration module is nothing but an effective Forminix way to speed up your email marketing campaigns and automation experience on HubSpot. Well, the deal is simple, “save time, do more!”.
So, what are you waiting for? Enjoy the new WordPress HubSpot integration. Start adding users from your WordPress to HubSpot contact list in a better and efficient way.
Lastly, please leave us your comments down below. Do not forget to share your thoughts on the new update. Your suggestions and opinions are valued, and we welcome you to post them as well.
Until next time, Take Care!


