
How amazing would it be if you could connect your Sendinblue with WordPress forms just within minutes. If you want to find out the best way for that, then this article is going to be quite interesting for you.
Continue reading further for details.
Sendinblue: A Reliable Choice for Digital Marketing
It goes without saying, Sendinblue has built quite the name throughout the years among the top digital marketing automation tools in the market.
In fact, it is undoubtedly popular for being an all-in-one platform for SMBs, B2B, B2C, ecommerce vendors, agencies.
Because it ensures better and reliable end-to-end marketing campaigns, transactional messaging, marketing automation and what not, the features are a lot.
To mention some of its top features and services, we have,
- Email and SMS marketing for better reach.
- CRM for building stronger customer relationships.
- Transactional email design, better deliverability and engagement.
- Facebook ads feature for retargeting and reaching new audiences.
So, if you have a new startup business and looking for the best digital automation tool with competitive pricing, Sendinblue is quite the irrevocable recommendation from us.
And to make your experience even better, Forminix Form Builder has brought to you their latest module that will enable you to connect your Sendinblue with WordPress forms in no time at all.
More about it in short.
WordPress Sendinblue Integration: Powered by Forminix
With the latest update, Forminix Form Builder gladly introduces their new addition to the module section, the WordPress Sendinblue integration.
As the name goes, this new feature now makes it possible to connect your Sendinblue with WordPress form(s) in a matter of clicks. Cool isn’t it?
If you have your Sendinblue up and running, you can now take advantage of gathering subscribers and send them from your WordPress to Sendinblue contact lists.
In this article we will take you through all the necessary steps for setting up your connection.
So, without any further due, lets hop right in.
NOTE: Before we get started it is recommended that you update your existing Forminix plugin to the latest version. However, if you dont have the plugin installed, you can
 checkout the various pricing plans from here.
5 Quick Steps to Connect Sendinblue with WordPress Form in Forminix
Before we begin, a quick note for you!
If haven’t yet made your Sendinblue account or you are new to the service, we recommend checking this video guide on how to create an account in Sendinblue and then go to this page to create an account first. After that, you can start off with this tutorial.
Okay, so for this tutorial we have built a custom contact form. With this form we will collect several user inputs and send them from our WordPress to Sendinblue contact list.
Because these various form field inputs will be used as specific subscriber profile information in our list for each submission.
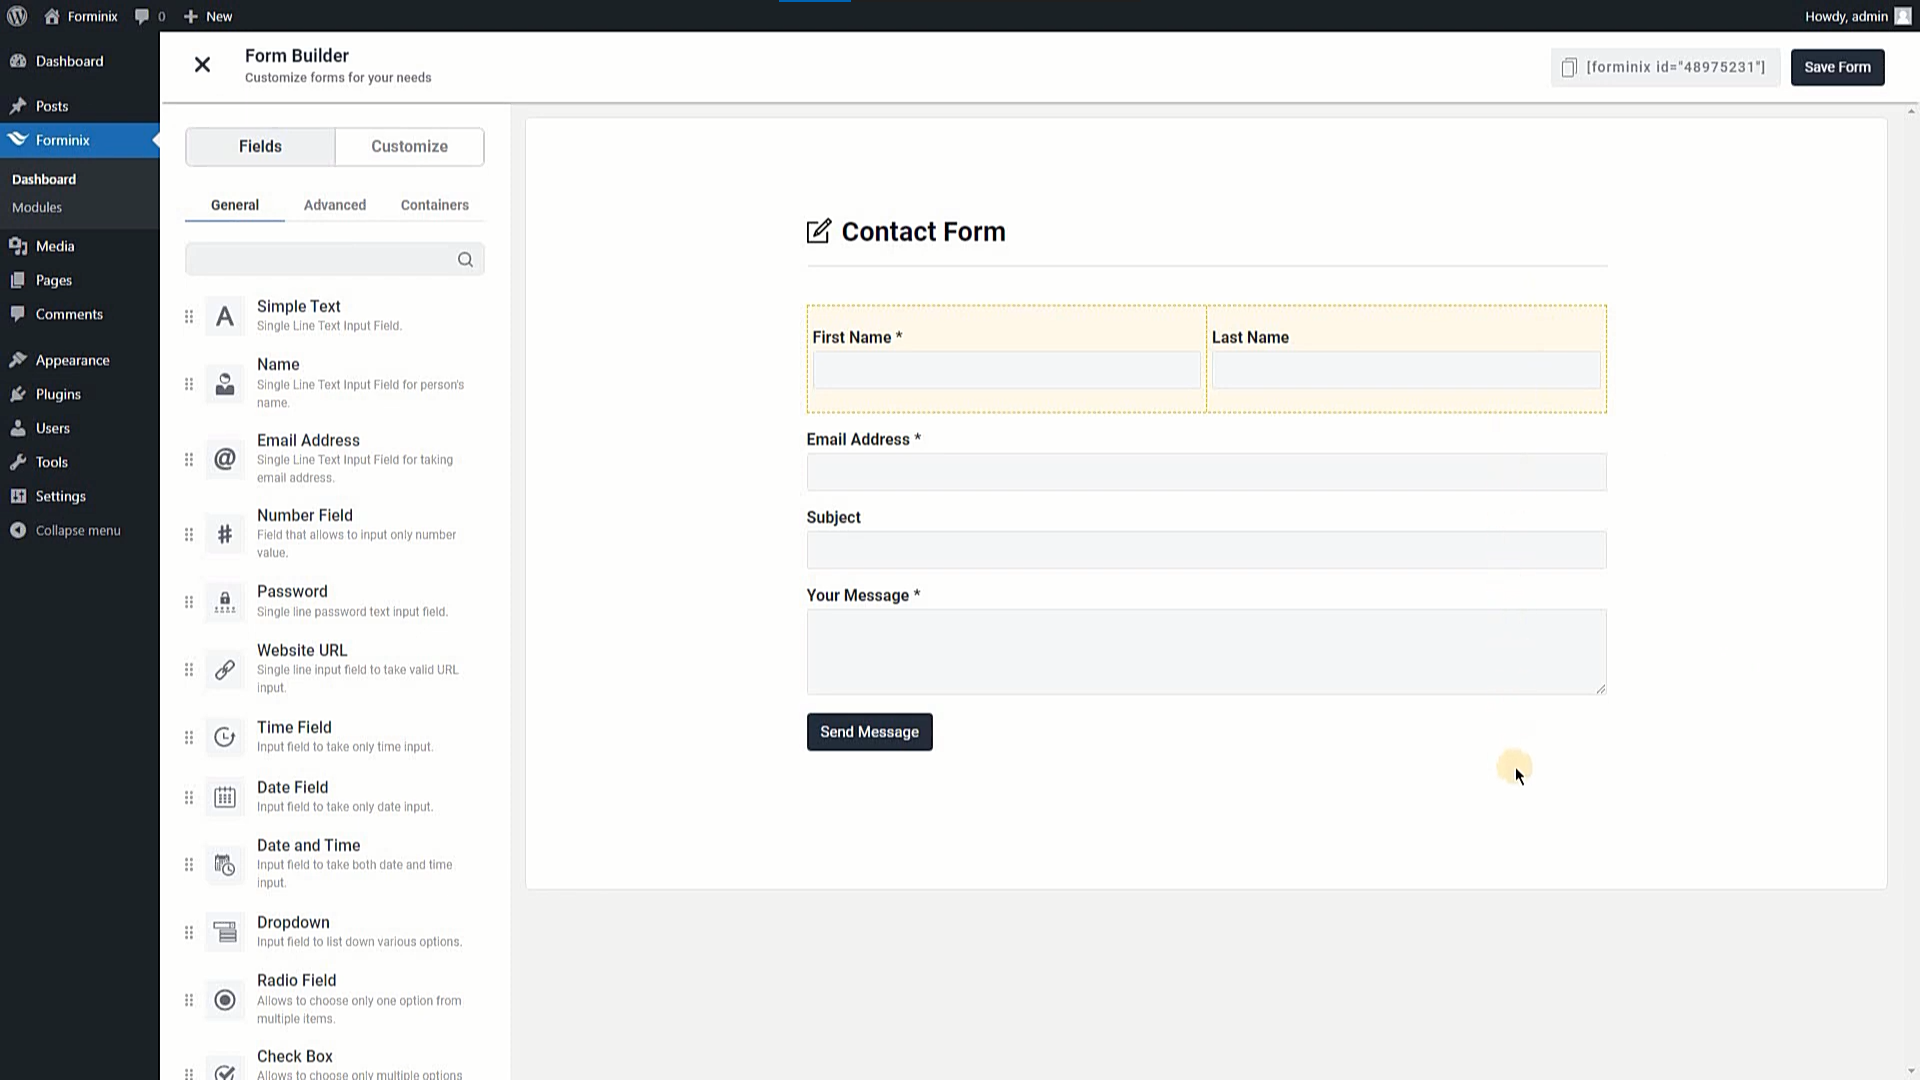
However, you can build and use all sorts of forms according to your need.
Step 1: Enable the WordPress Sendinblue Integration
Go to your WordPress admin panel and navigate to the “Modules” menu of the Forminix plugin. Then find and enable the Sendinblue integration toggle.
Step 2: Add Integration in the Form Settings
On the next step, navigate to your form’s settings page and then click on the “Integrations” tab on the top right.
Afterwards, you will see the “Add Integration” button down below the page. Click on it and a popup will appear. From there, select the newly enabled “Sendinblue” integration.
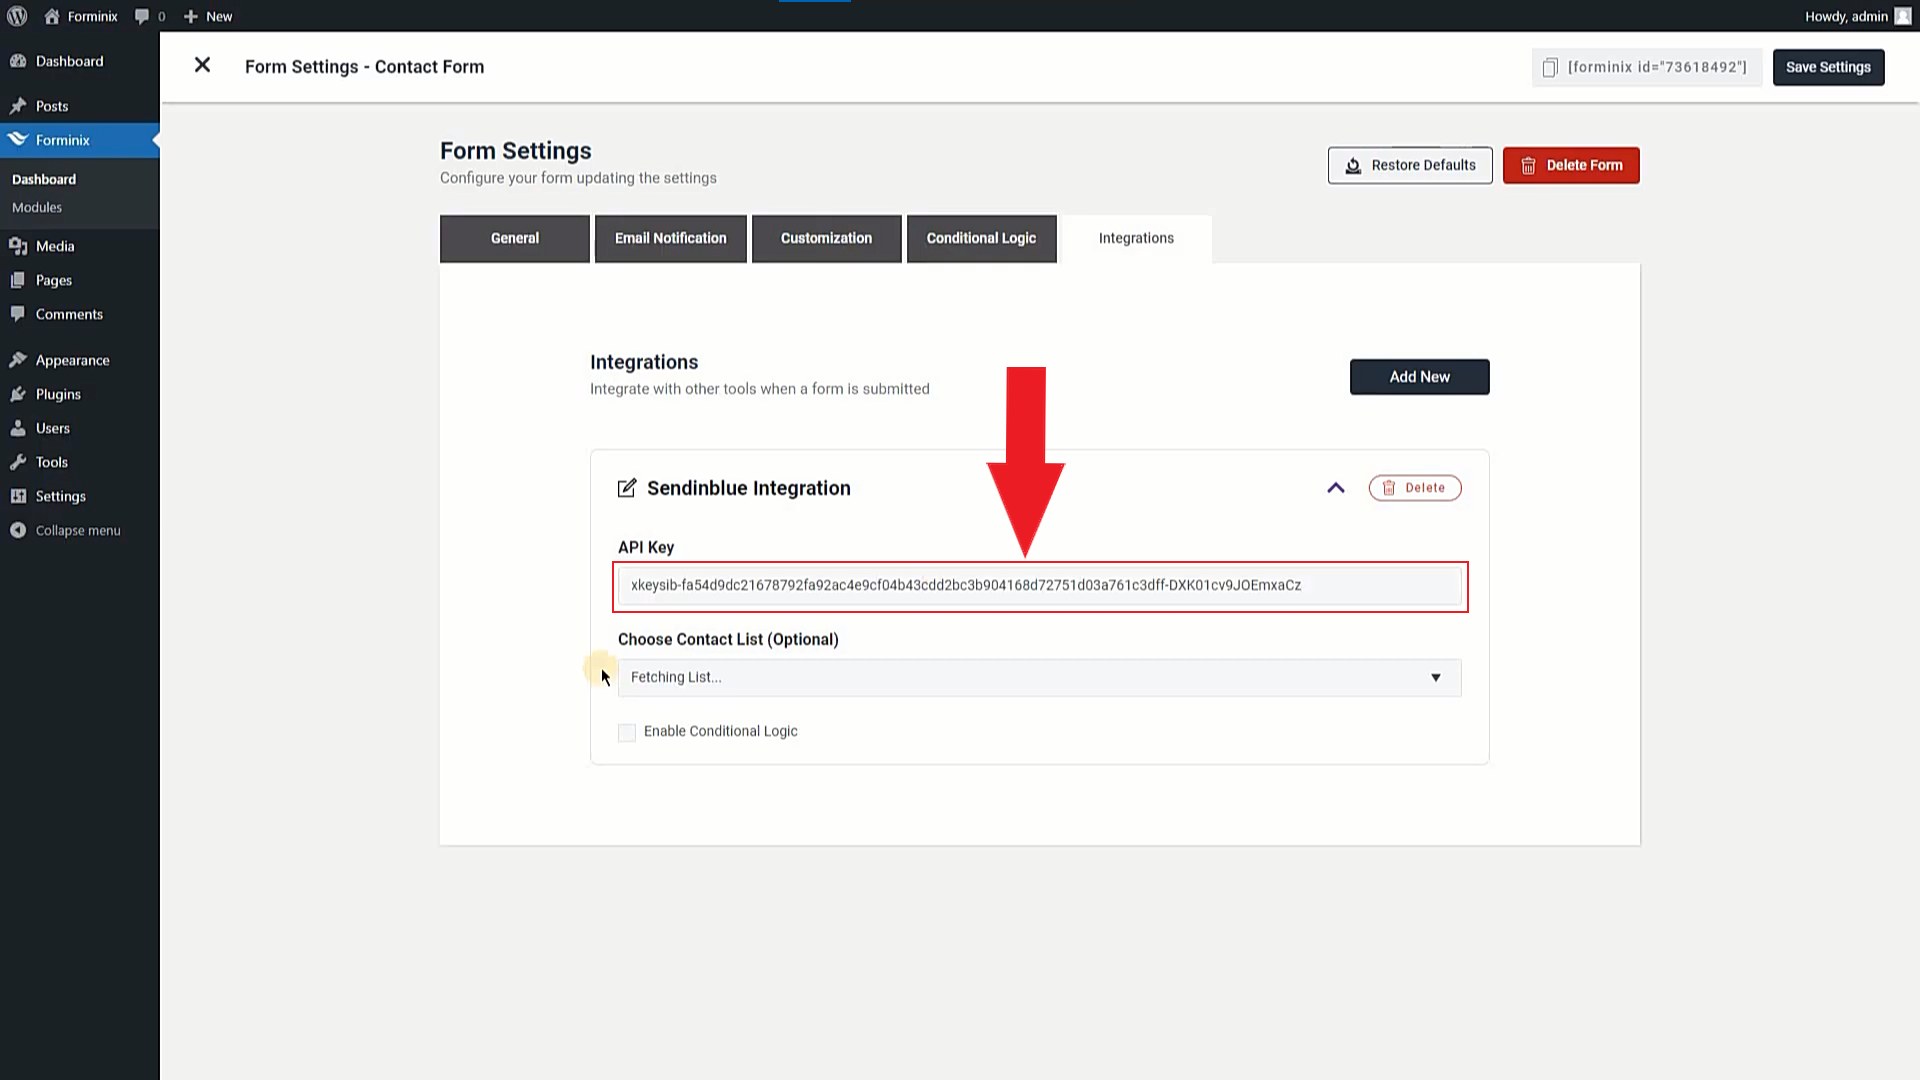
Step 3: Add Sendinblue API Key and Contact List
Inside the “Sendinblue Integration” panel you will find two fields. They are the “API Key” field and the “Contact List” field. Let’s learn about them in detail and fill them up.
API Key:
Setting the API Key is a must for you to be able to send subscribers/users from your WordPress to Sendinblue contact list.
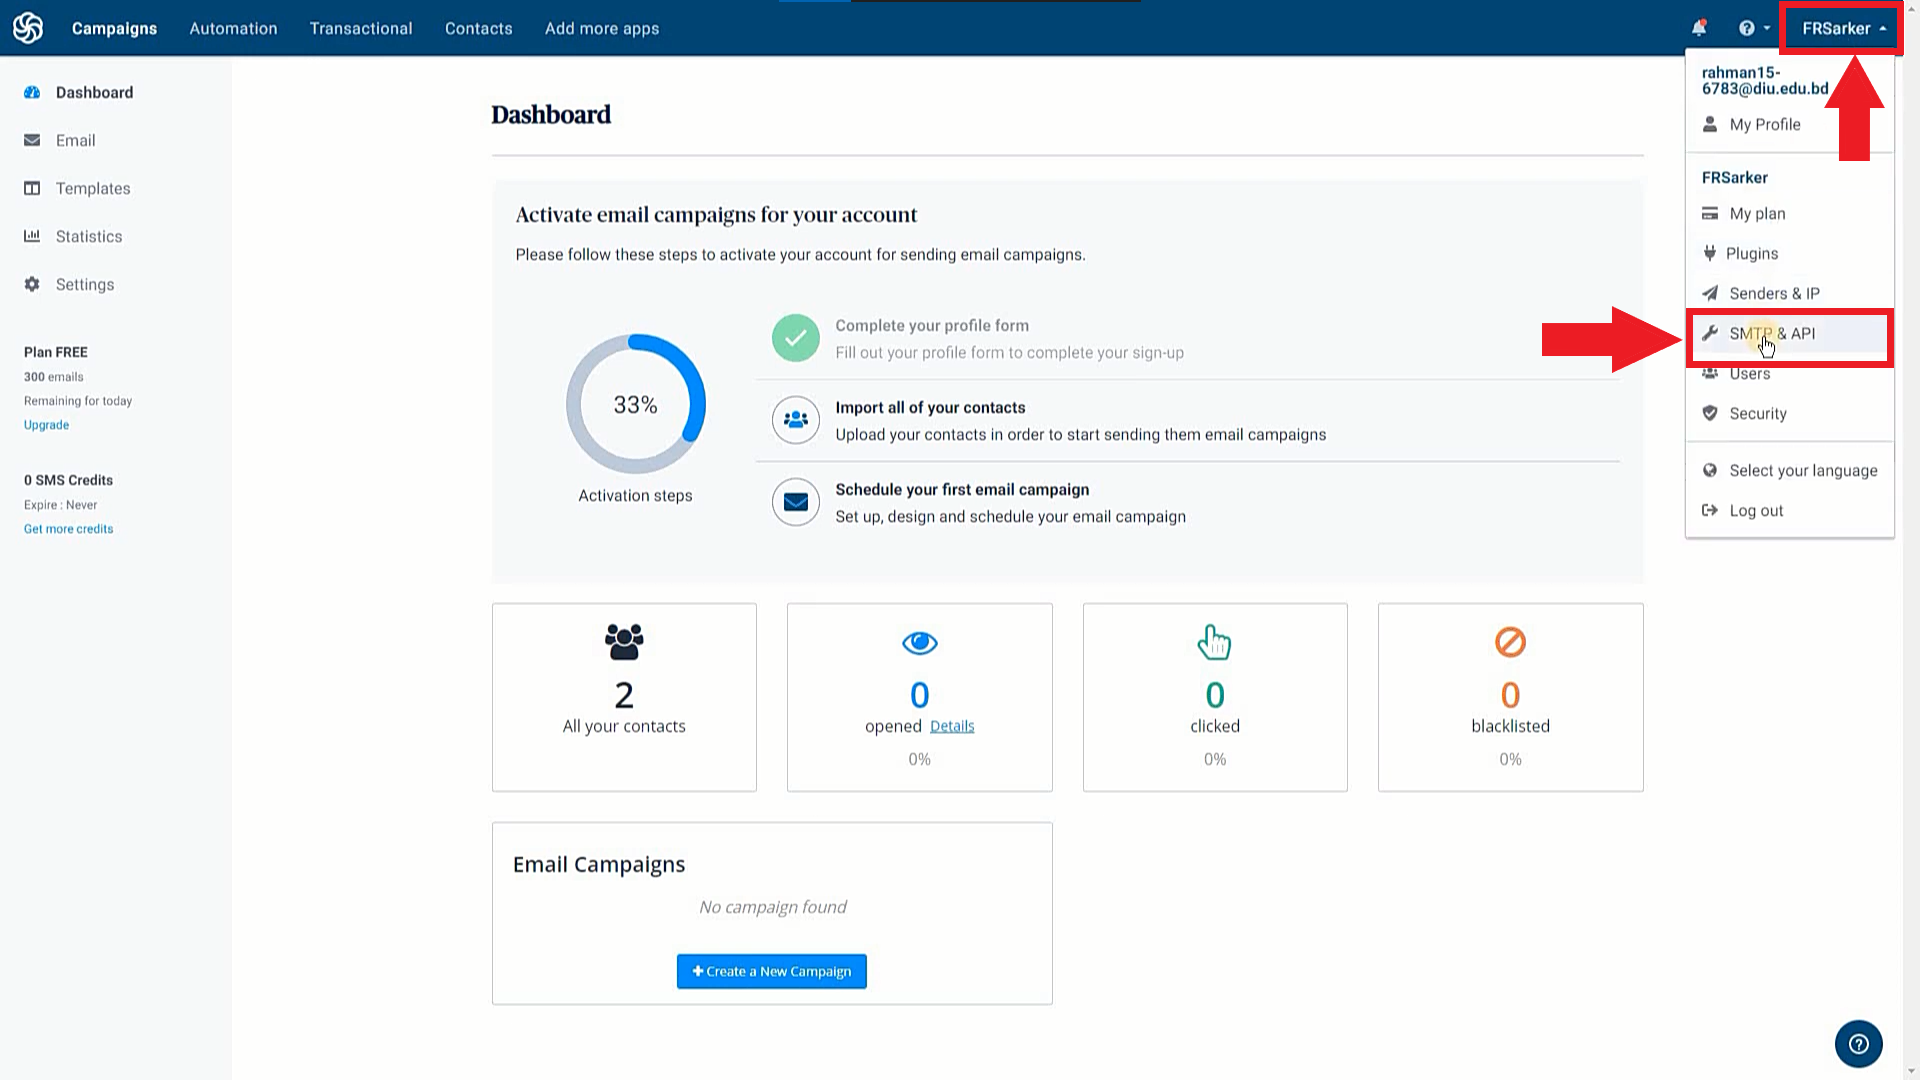
Here in this field, you have to provide your Sendinblue API. To get the key, simply go to your Sendinblue account dashboard. Then on the top right corner, click on your profile icon. From the dropdown menu, click on the “SMTP & API” option.
On the next page, in the “API Keys” section you will be asked to create your first API key if you haven’t created any before.
Simply click on “here” and a pop up will appear. From there, set a name for your key and hit the “Generate” button.
And that’s it, your new key will be generated instantly. You then have to copy the key from that popup or from your “API Keys” section and paste it inside the respective field in Forminix as shown below.
NOTE: You can enable the conditional logic option at the bottom if you want to use it.
Choose Contact List:
You can choose a contact list of your Sendinblue account where your users/subscribers will be added. Immediately after inserting the API Key, Forminix will fetch the contact lists from your Sendinblue account instantly.
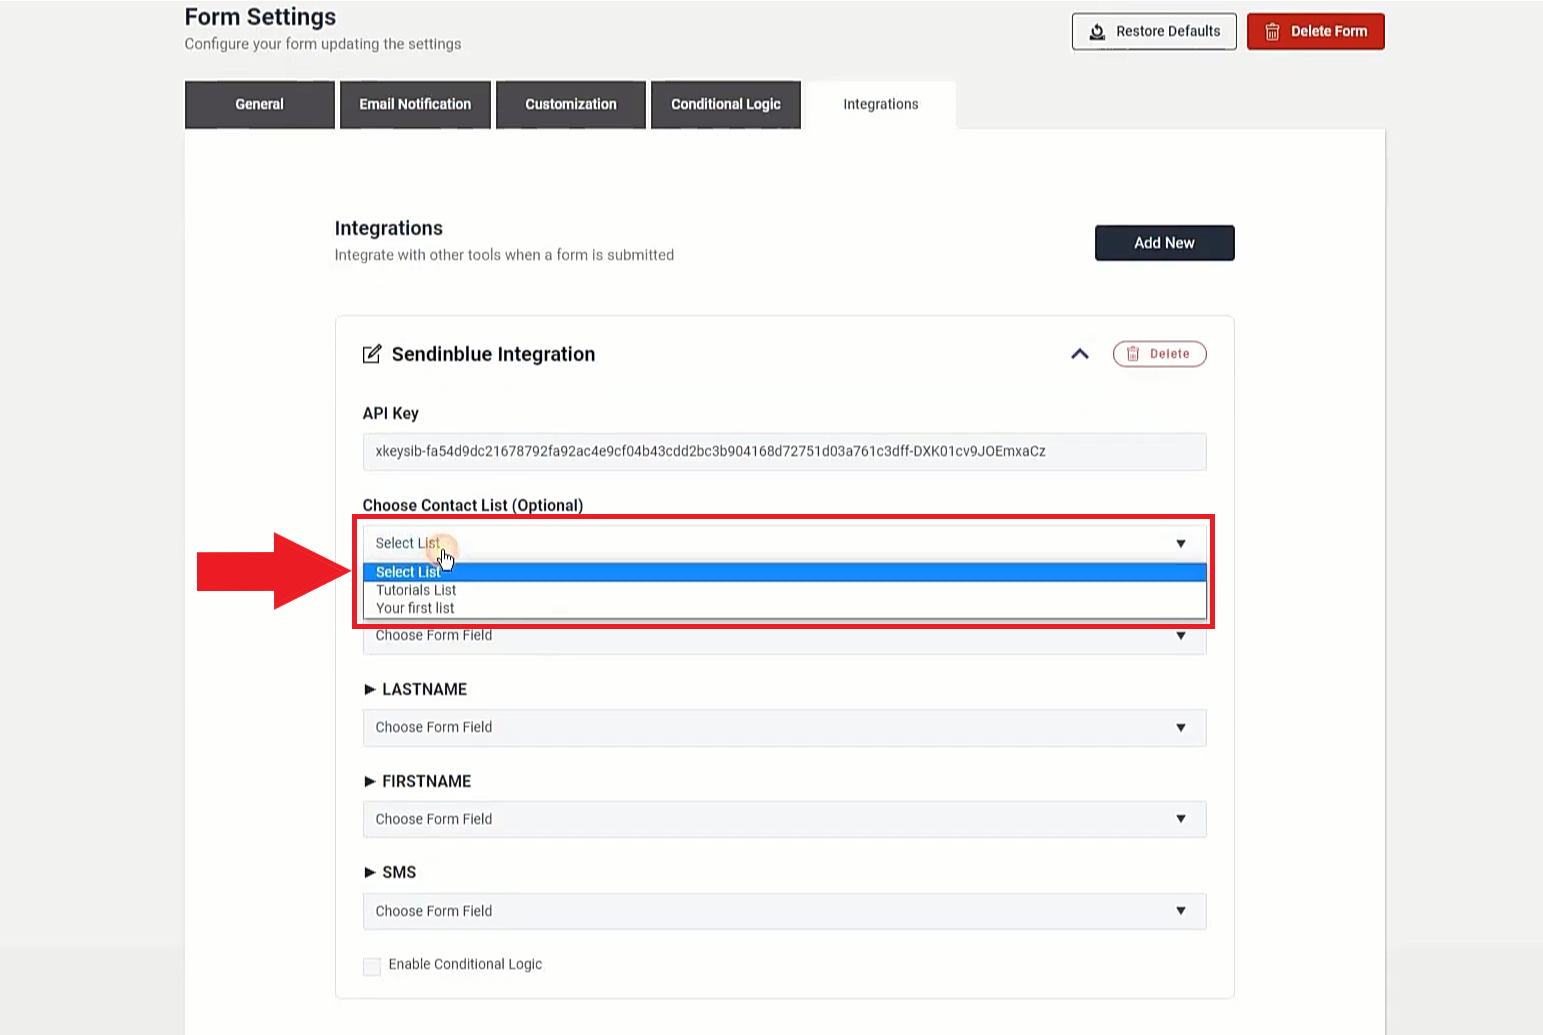
So, click on this field and select your preferred contact list from the dropdown menu to connect your Sendinblue with WordPress form.
Step 4: Map the Form Fields for Sendinblue User Profile
We are almost at the end of our setup. After finishing up all the previous steps, we now have to map the form fields.
Because these mapped fields will work as the profile information of users or subscribers who will be added from our WordPress to Sendinblue contact list.
In this tutorial we have selected the “Email Address” field as the Sendinblue subscriber’s email address, “First Name” field as their first name and “Last Name” field as their last name.
Step 5: Save All Settings and Test WordPress Sendinblue Integration
So finally, we have to save all the settings that we have made so far by clicking on the “Save Settings” button on the very top right corner of the Forminix plugin page.
Now let’s start testing our WordPress Mailchimp integration and see how it goes.
Fantastic! Our WordPress Sendinblue integration is working perfectly.
To see the list of your user profile info in Sendinblue, click on “Contacts” at the top of your Sendinblue dashboard. On the next page you can see your subscribers list with all your mapped form information as shown above.
And, if you detect any issue, recheck all the previous steps and fix the mistakes if found any.
So, now you know how to connect your Sendinblue with WordPress form with Forminix.
Conclusion
In this tutorial we have showed you all the necessary steps and details to connect your Sendinblue with WordPress form. The whole process is user-friendly and won’t take you more than a minute.
Therefore, we hope that you can now configure the WordPress Sendinblue integration in your Forminix plugin successfully. Thus, start adding subscribers from your WordPress to Sendinblue contact list through form submissions.
Make your Sendinblue email marketing automation campaigns quicker and smoother. As, you won’t have to look for other expensive alternative tools. Thanks to Forminix Form Builder’s latest integration module that bridges your Sendinblue with WordPress in less than a minute.
Forminix Form Builder is growing with the trust of people, making their developments and growth quicker by the days. We look forward to having your continued support and love for making the WordPress form building experience even grander and richer.
Last but not the least, please leave your comments down below. If you have any queries and suggestions, share them as well.
Until next time, Take Care.


