
If you are looking for a trouble-free way to connect your Mailjet with WordPress form(s) on your website, then this article has got you covered.
Mailjet is undoubtedly quite a popular choice among the robust email service providers out there in the market. It’s power packed features such as,
- Targeted email marketing campaigns,
- Sending transactional and marketing emails from the same account,
- Impressive templates along with drag-and-drop email builder,
- Dedicated space for team collaboration in one platform etc.
make it an all-in-one solution for you and your business. And, if you have just started your Mailjet journey and want to have a better experience, Forminix Form Builder has brought you a quick and easy way.
Let’s take a look how it works.
WordPress Mailjet Integration: The New Member of Forminix Modules
Your very own Fominix Form Builder plugin has brought yet another brand-new feature at your disposal. A new addition to modules, the WordPress Mailjet integration.
This amazing module enables you to easily connect your WordPress with Mailjet within a minute. A quicker and hassle-free way to add users/customers from your WordPress to Mailjet contact list through form submission.
As a matter of fact, Forminix saves you the trouble of searching and going through other expensive alternative solutions to your Mailjet connectivity with WordPress.
In this article we will take you through all the required steps for adding your users from WordPress to Mailjet in no time.
So, without any further delay, let’s get started with the setup.
NOTE: Before we get started it is recommended that you update your existing Forminix plugin to the latest version. However, if you haven't downloaded the plugin yet, you can either,
checkout the various pricing plans from here.
Important Steps to Connect Mailjet with WordPress Form in Forminix
Before diving into the main process, a little head’s up! If you haven’t yet done your Mailjet setup, follow this link to create an account first. After completing that, you can start off from here.
For sake of this tutorial to connect our Mailjet with WordPress form, we have built a custom contact form. Through this form, we will be collecting various data from user inputs. And then, send them from our WordPress to Mailjet contact list.
Because they will work as the profile information of our users in that list.
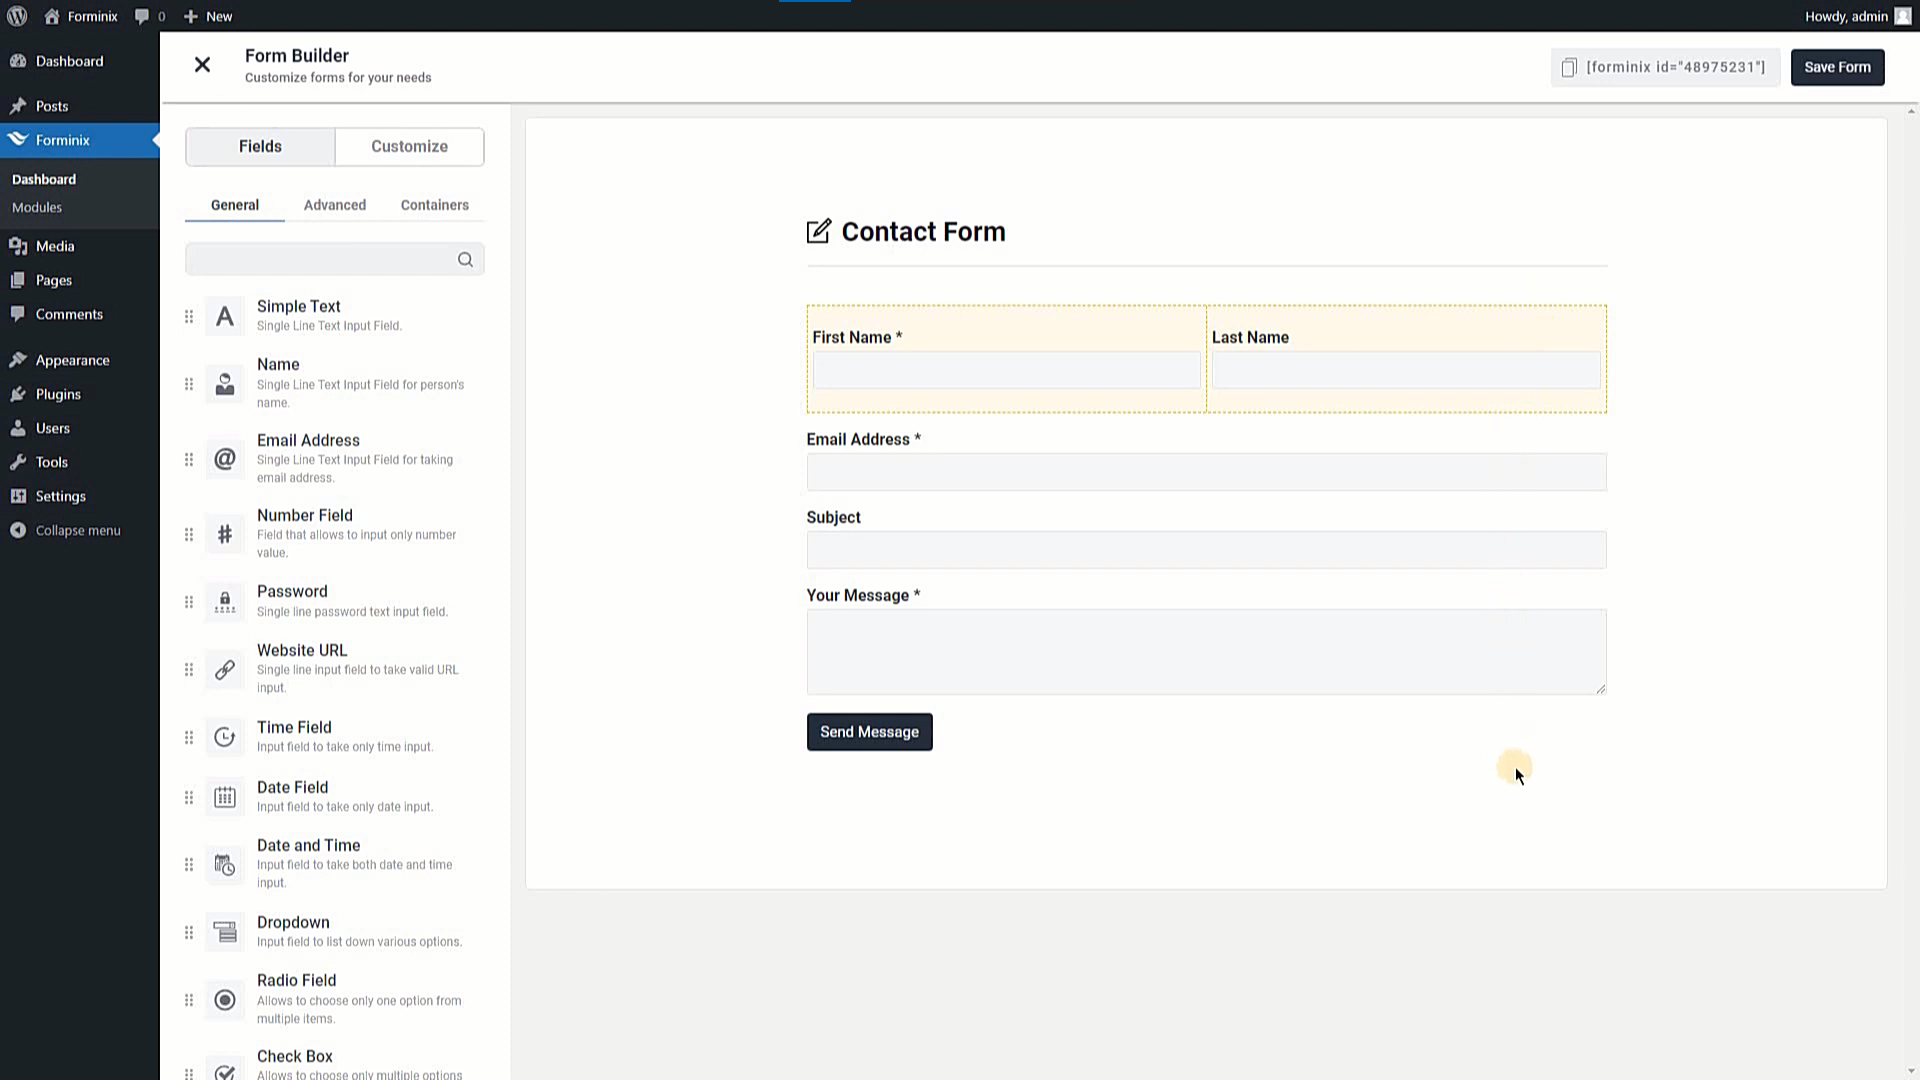
Besides, you can create and use any kind of form you want for this purpose.
Step 1: Enable the WordPress Mailjet Integration
First of all, go to your WordPress admin panel. Then navigate to the “Modules” menu of the Forminix plugin and hit the Mailjet toggle to enable the integration.
Step 2: Add Mailjet Integration in Form Settings
Up next, go to your form’s settings page and click on the “Integrations” tab.
Inside the “Integrations” tab you will see the “Add integration” below. Click on it and a popup will show up. Then, select the “Mailjet” integration that you have enabled previously.
NOTE: Click the “Enable Conditional Logic” option at the bottom if you require for your form.
Step 3: Provide Mailjet API Key, Secret Key and Contact List
Now we have couple of things to notice carefully. Inside the “Mailjet Integration” panel you will find three fields. They are the “API Key” field, the “Secret Key” field and the “Choose Contact List” field.
Let’s, take a look at these and fill them up.
The API Key and Secret Key:
In these fields you have to provide the API key and secret key of your Mailjet account.
To do that,
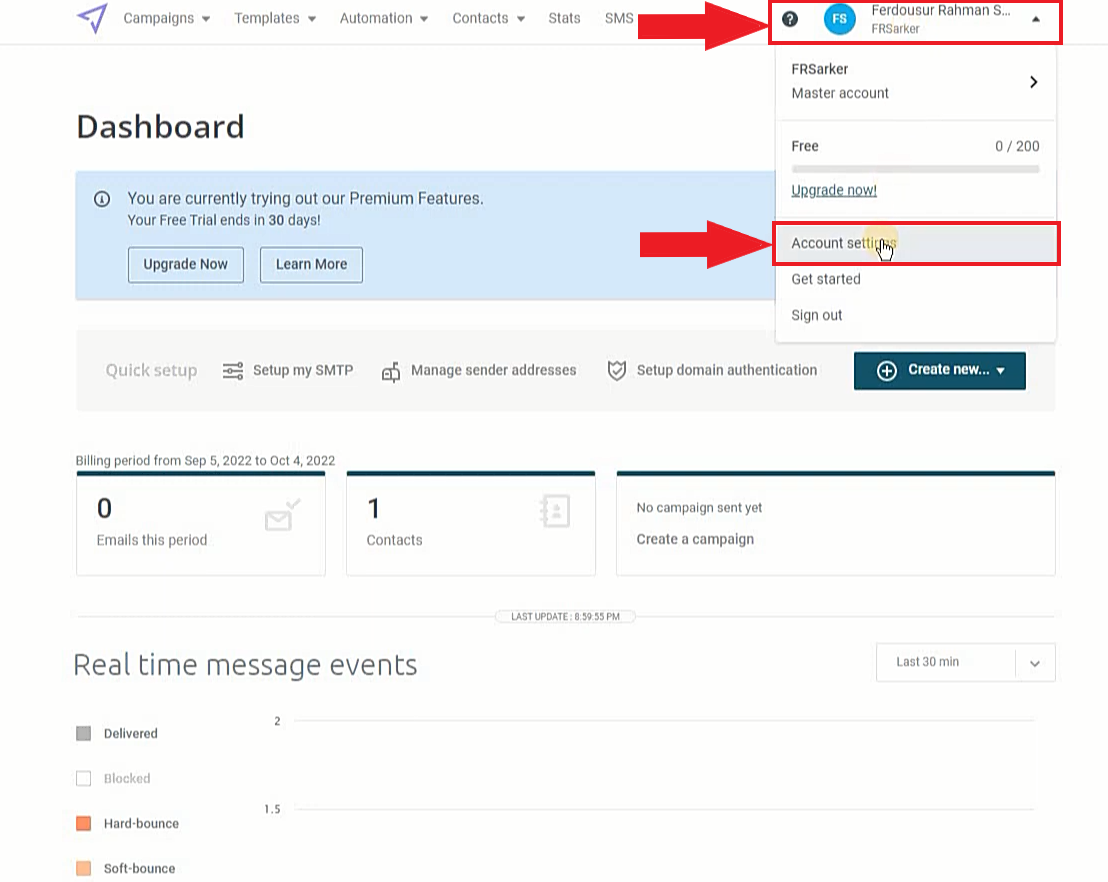
1. Simply go to your Mailjet account dashboard and click on your profile icon on the top right corner. Then click on “Account Settings” option.
2. On the next page (Account Information), click on the “API Key Management (Primary and Sub-account)” option inside the “Rest API” section.

3. Finally, on the next page, you will see the “Primary API Key” section from where you can manage/reset your Mailjet “API Key” and “Secret Key“.
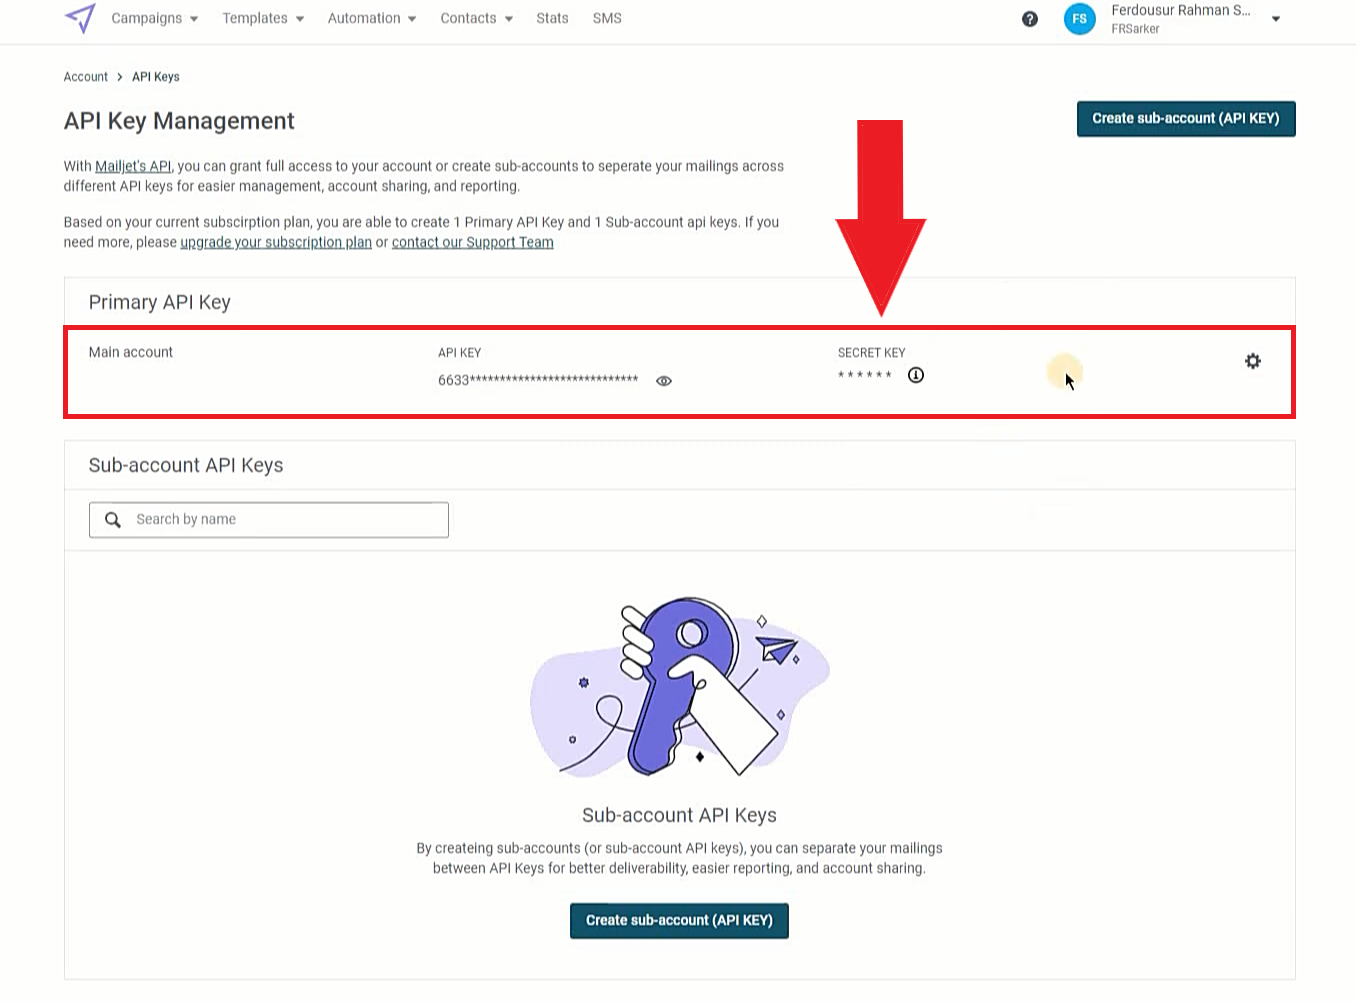
NOTE: If this is your first time with Mailjet or you did not create any keys before, you can create them on this page easily.
As we have already created our API Key and Secret Key, we will be copying and placing them inside the respective fields in Forminix as shown below.

Choose Contact List:
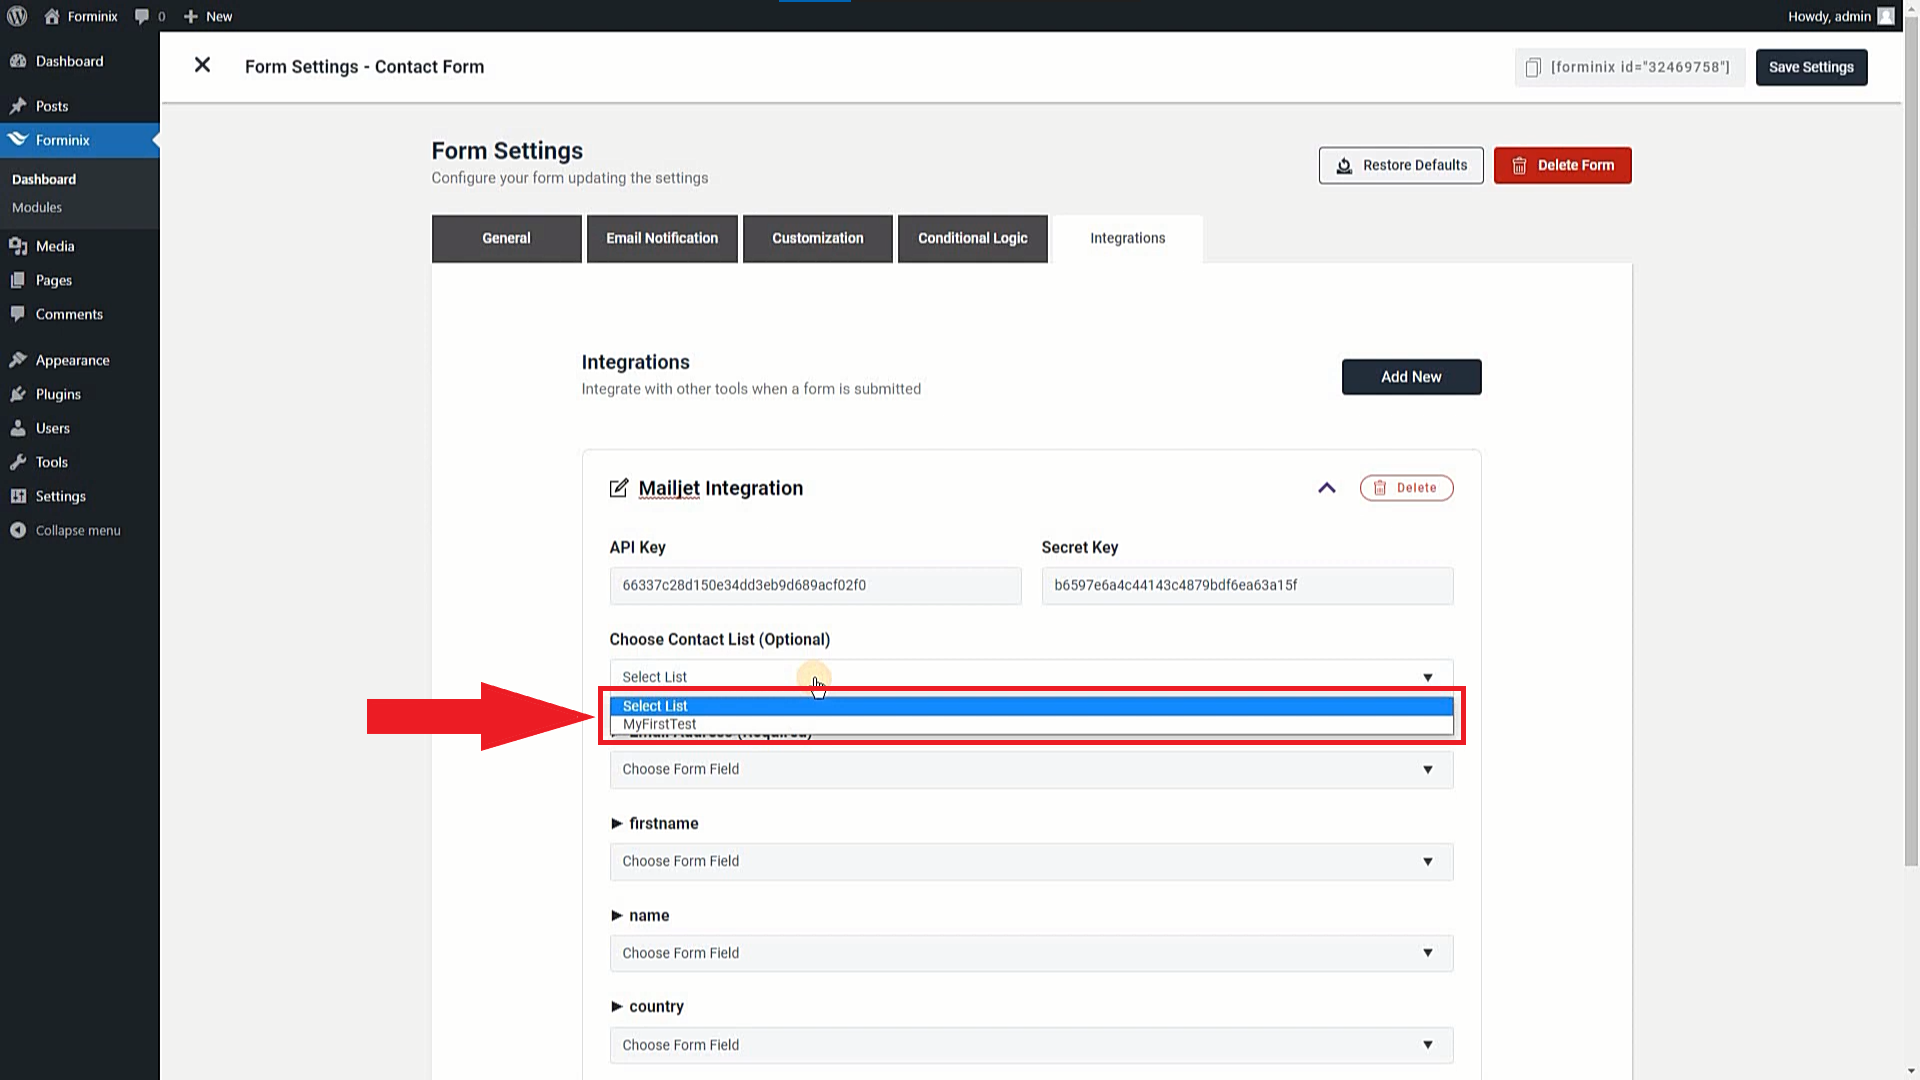
In this field you can choose a contact list of your Mailjet account where your users/customers will be added. Right after providing the API Key and Secret Key, Forminix will instantly fetch the contact lists from your Mailjet account.
So, click on the field and select your preferred contact list from the dropdown to connect your Mailjet with WordPress.
Step 4: Map the Form Fields for Mailjet Profile Information
After finishing the previous steps properly, we now have to map the form fields. Because our mapped fields will be used as the profile information of the users/customers who will be added from our WordPress to Mailjet contact list.

For this tutorial we have chosen the “Email Address” field as the Mailjet user’s email address, “First Name” field as their first name.
Step 5: Save All Settings and Test the Mailjet Integration
Finally, we have to save all our settings that we have done yet by clicking on the “Save Settings” button on the top right corner of Forminix plugin page.
Now comes the testing part. Let’s test our WordPress Mailjet integration to see how it goes.
Yes! Everything is working properly as we expected. Now, to see the list of your user/customer profile information after any form submission, head to your Mailjet dashboard and navigate to Contacts > All Contacts from the top menu.
From there you can see all your users and their details that you have mapped in the Mailjet integration.
Do note that, if you face any issue with your outcome, recheck all the steps and identify the problem.
So, this is it, now you know how to connect your Mailjet with WordPress form(s) with Forminix.
Conclusion
We hope that this article served its purpose by showing you all the steps required to connect your Mailjet with WordPress form(s) using Forminix.
The whole setup process is quite easy to follow and very user-friendly, so you do not have to worry about messing up something. Creating Mailjet contact lists for email marketing campaigns is now quicker and smoother with Mailjet integration.
Forminix Form Builder is exceling by the days and introducing amazing features that matter to the users the most. And the WordPress Mailjet integration is just another step forward for Forminix Form Builder, ensuring better user experience.
So, dont waste any more time thinking and enjoy this amazing integration. Start sending user information from your WordPress to Mailjet today.
Lastly, do not forget to leave your precious comments down below. If you have any queries or suggestions, please post them as well.
Until next time, Take Care.


