
It goes without saying that one of the most crucial aspects of running a successful online business requires reaching your target audiences in a better and improved way. So, if you are looking for a way to connect your Mailchimp with WordPress forms on your website, you are in luck today. Because, we have brought to you an easy and hassle-free solution.
Mailchimp: A Trusted Name
Email marketing has been around the corner for a while now and is being widely used by businesses for running brand promotions, email campaigns and what not.
And to make your experience even better, Mailchimp marketing automation tool enables you to run not only various email marketing campaigns but also,
- Design email templates.
- Build website for your brand.
- Create organized audience lists.
- Send targeted emails etc.
In this tutorial we will be using the amazing Forminix Form Builder Plugin’s new integration feature that will enable you to connect your Mailchimp with WordPress forms within clicks.
Continue reading further for details.
WordPress Mailchimp Integration: A New Addition in Forminix
Forminix Form Builder Plugin is growing rapidly by the days by improving user experience and introducing many new features, upscaling your form building experience on WordPress to a new level.
Forminix now gladly presents its latest WordPress Mailchimp integration that enables you to easily connect your Mailchimp with WordPress forms.
In this article we will be showing you in detail how simply you can collect various user/audience/customer information and send them from your WordPress to Mailchimp audience list for profiling.
So, without any further due, lets dive right in.
NOTE: Before we get started it is recommended that you update your existing Forminix plugin to the latest version. However, if you haven't downloaded the plugin yet, you can either,
checkout the various pricing plans from here or download the free version from here.
A Step-by-step Guide for Connecting Mailchimp with WordPress Forms
First and foremost, if you haven’t set up your Mailchimp then you should checkout this detailed guide to create an account and complete the setup.
For sake of this tutorial, we will be creating a contact form and collect different user inputs to store them in our audience list in Mailchimp. However, you can build and use any type of form you need.

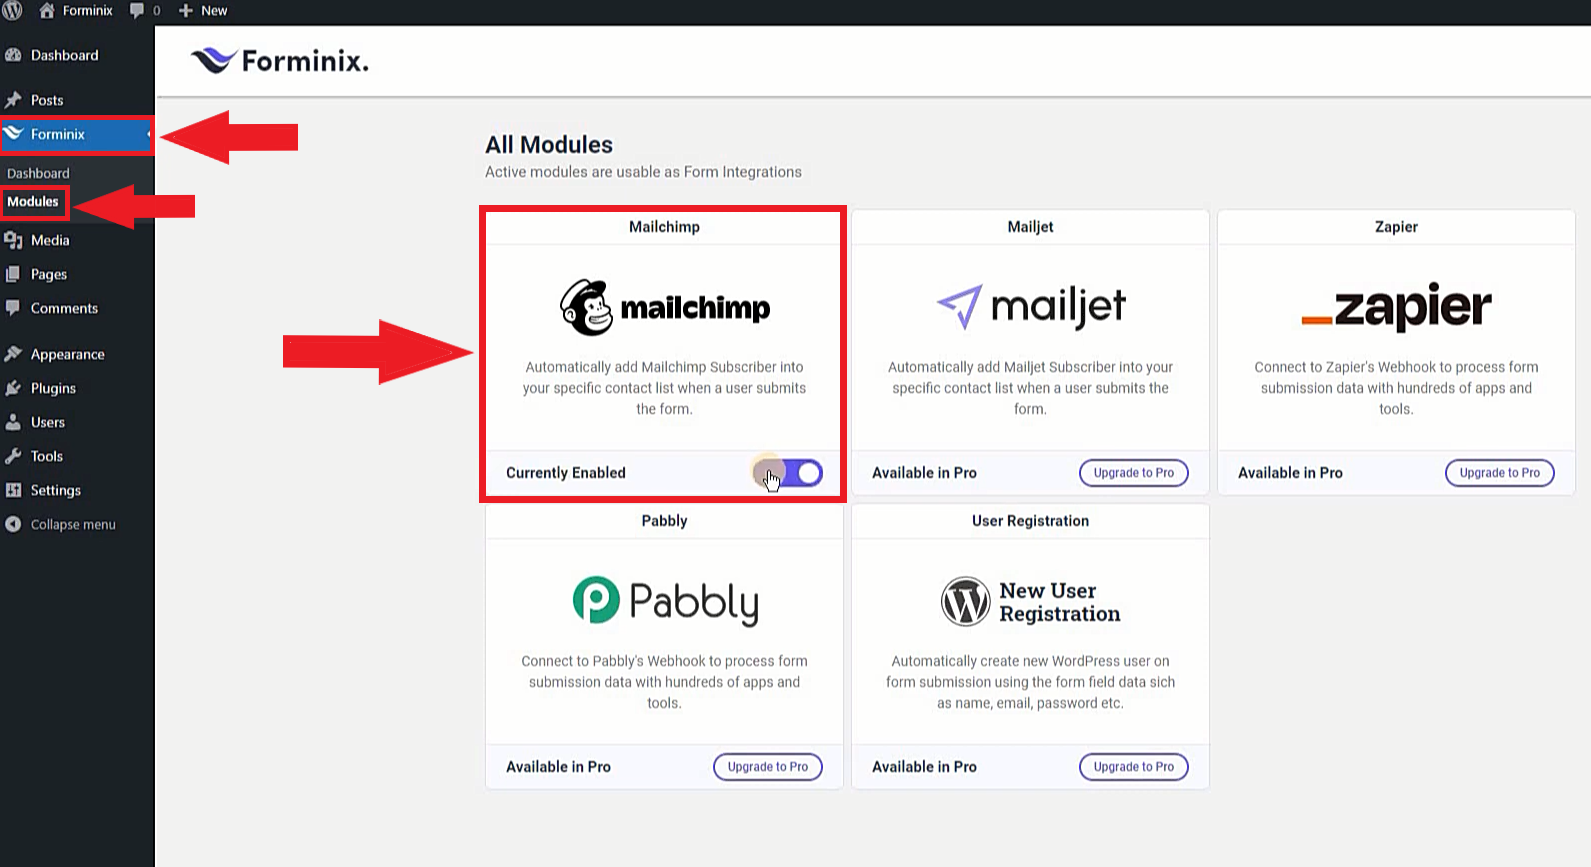
Step 1: Enabling WordPress Mailchimp Integration
From your WordPress admin panel, navigate to the “Modules” menu of the Forminix plugin and enable the Mailchimp integration toggle.
Step 2: Adding Integration in Form Settings
Next, navigate to your form’s settings page and then click on the “Integrations” tab.
After that, you will see the “Add Integration” button down below that page. Click on it and a popup will appear. From there, select the newly enabled “Mailchimp” integration.
Step 3: Adding Mailchimp API Key and Contact List
In the “Mailchimp Integration” panel you will see two fields. They are,
API Key:
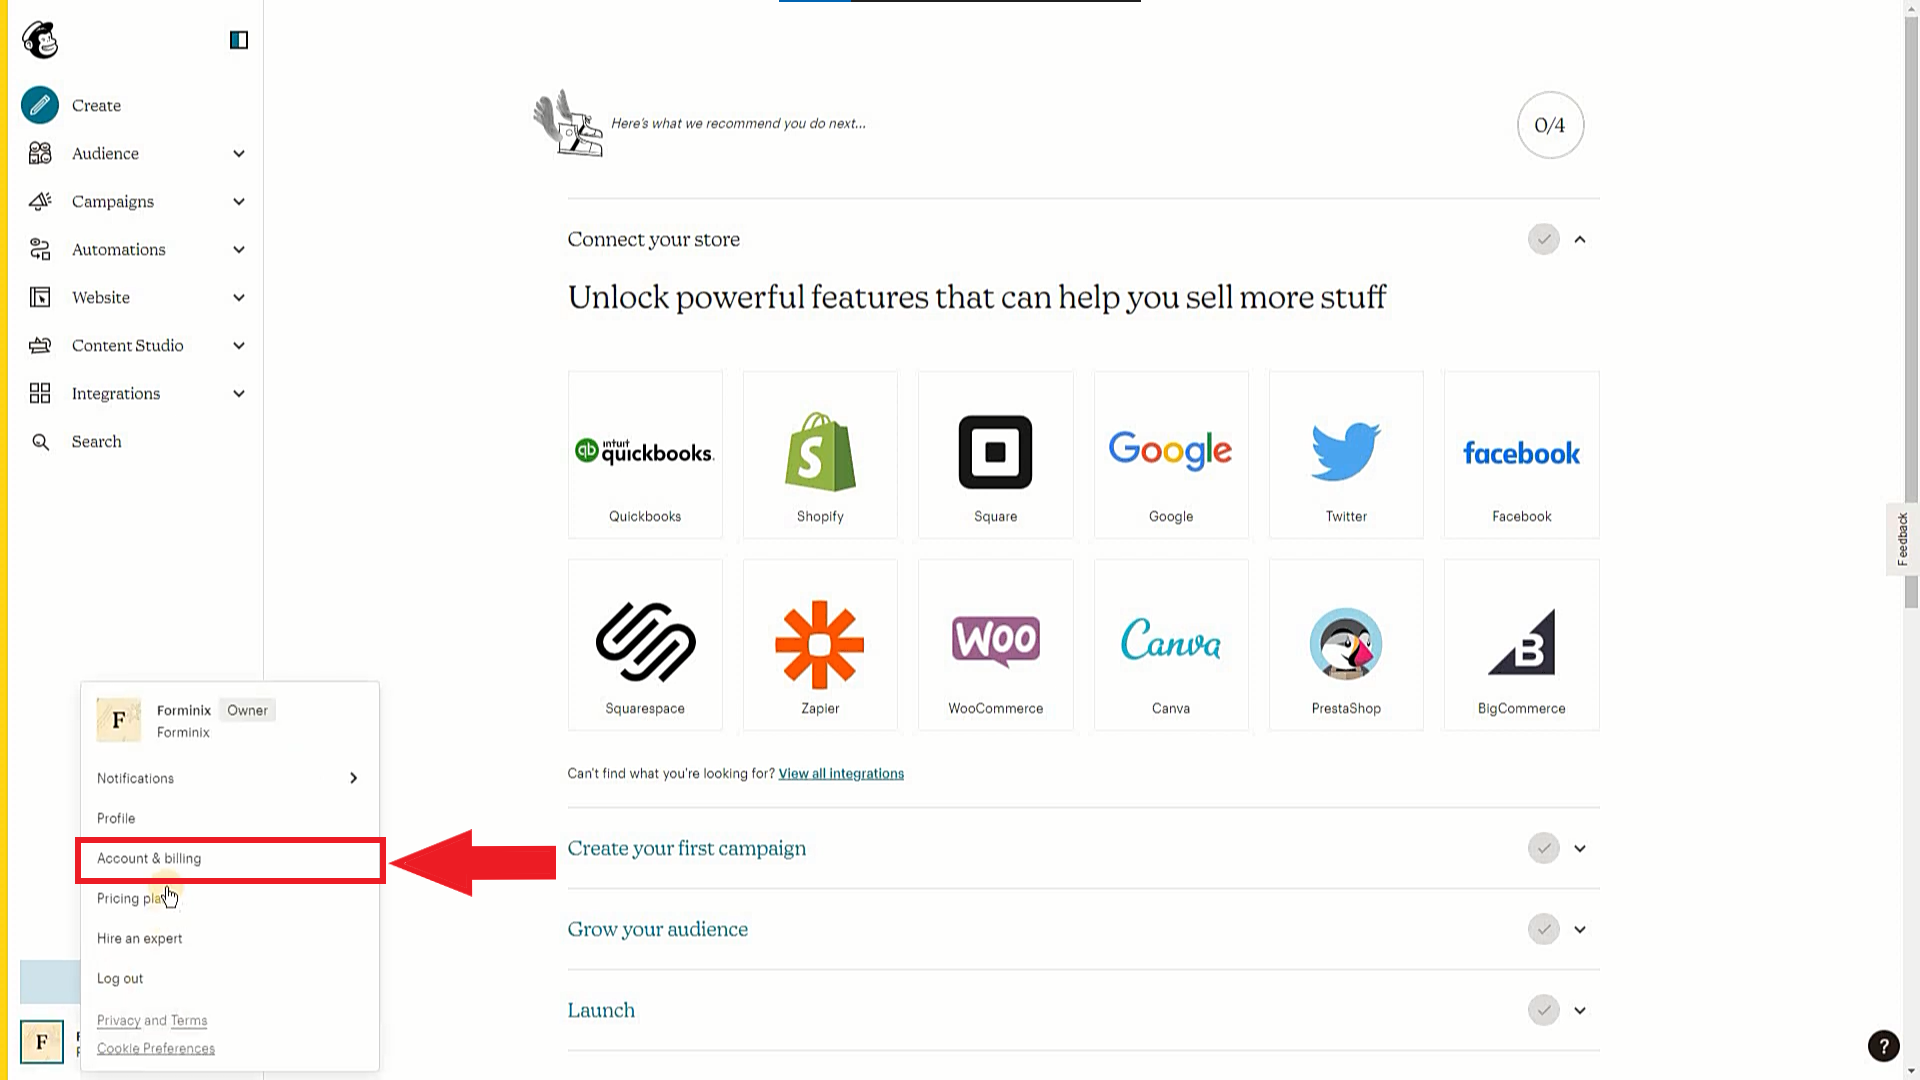
In this field you have to enter your Mailchimp API key. Don’t worry its fairly simple, to get the key, go to your Mailchimp account and click on the profile icon on the bottom left corner.
Then select the “Account & billing” option as shown in the picture below,
Then on the new page navigate to Extras > API keys. If you haven’t yet created an API key, just simply scroll down a bit and click on the “Create A Key” button in the “Your API keys” section and your key will be generated in an instant.
Now, simply copy and paste the API key into the respective field inside Forminix as shown below.
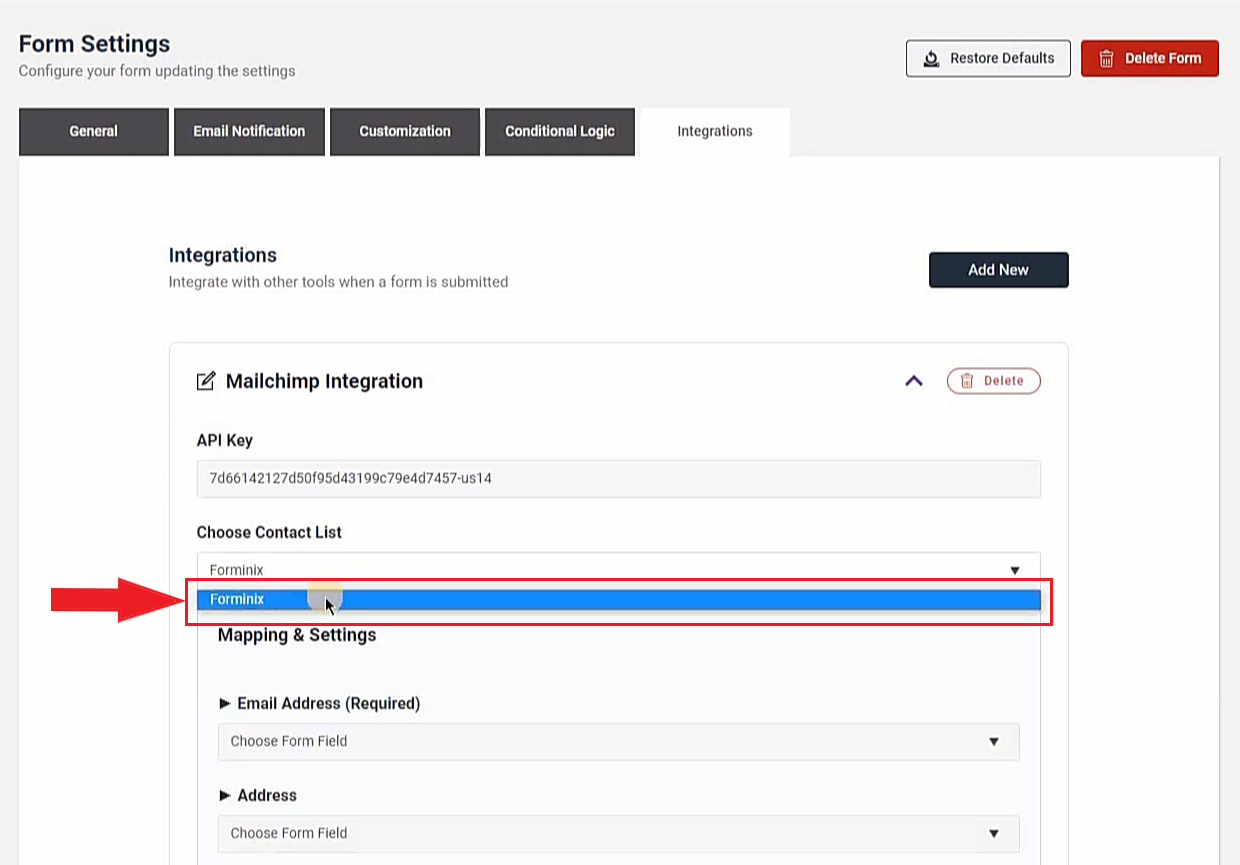
Choose Contact List:
In this field you have to select the contact list of your Mailchimp where your subscriber/users will be added. Click on the field and select your contact list from the dropdown menu.
Step 4: Mapping the Form Fields for Profile Information
After you are successfully done with all the previous steps, now you have to map your form fields. In simple terms, your selected form fields will work as the profile information of a subscriber/user/customer of your contact list.
For this tutorial we have selected the “Email Address” field as the Mailchimp subscriber’s email address, “First Name” field as their first name and “Last Name” field as their last name.
NOTE: You can also choose custom tags (use comma separated value for multiple tags) and double Opt-in option down below if you need to.
Step 5: Saving All the Settings and Testing Mailchimp Integration
Lastly, save all your form settings that you have done so far by clicking on the “Save Settings” button on the very top right corner of the Forminix plugin page.
Then start testing your WordPress Mailchimp integration. If you stumble upon any issue, recheck all the previous steps and correct the mistakes if found any.
After submitting the form, to see the listing of the subscriber profile information in Mailchimp, navigate to Audience > All contacts on your Mailchimp dashboard and there you can see your audience list with all the mapped information as shown above.
This is how you can connect your Mailchimp with WordPress form(s).
Final Words
Hopefully we were able to show you each and every step to setup and use the new WordPress Mailchimp Integration in Forminix.
Make your desired audience/subscriber list by sending data from your WordPress to Mailchimp within few clicks. Moreover, this whole process is completely user-friendly once you get the hang of it.
It is now easier than ever to build targeted mailing lists with submitted forms on your website. Thanks to Forminix’s easy and simple methods that allow you to connect your Mailchimp with WordPress forms fairly quickly.
Carefully follow each step to successfully complete the setup. Don’t forget to leave your comments down below and share your suggestions if you have any.
Until next time, Take Care.


