If you are thinking about how your customers or visitors are going to reach you from your website, then setting up a contact form is a quick and smart solution. And, what is a better way than using a WordPress form builder plugin to make it happen even more efficiently (if you are running a WordPress site).
In this article we are going to take you through a step-by-step guide on how to create WP forms using a WordPress form builder plugin. So, stay tuned till the end of this article for detailed instructions.
Why is a WP Contact Form so Necessary for Your WordPress Site?
Adding a contact form is quite an essential thing to consider while setting up your business or blogging site on WordPress.
Because, through this form, your users and customers can easily reach you with their queries or questions, making a better structured communication between buyer and seller.
It is not a surprise that you might have thought of adding just your email address for people to reach you other than figuring out different ways.
That goes without saying, it can be a bit tricky to look for WordPress form builder plugin and spend time on setting up a contact form or any other form for that matter if you are new to this platform.
So, adding just your email address is the easiest way in your eyes. But there are some issues regarding that idea that need to be considered.
- Inviting spams: Online spam bots crawl throughout the web looking for the “mailto:” email address tag that they use to send spam emails. On the other hand, a WP contact form hides your email address and can also block spam emails from making their way to your inbox.
- Lack of control over information: Through email you have no control over the information that you want to collect from your users. But, in a contact form you can specify certain information fields that need to be filled in such as name, gender, IDs, address etc. Which makes the whole experience more organized and less cluttered.
- Time consuming: Users will not send all the required information on their emails as there is no predefined structure for them to follow like WordPress forms. So, it will results in increased back and forth email transmission. Which will consume a lot of time for both the parties.
So without any further due, lets hop into the main process of creating a WP contact form.
NOTE: In this tutorial we will be using Forminix WordPress form builder plugin. It is a great tool for making any kind of WP forms, thanks to it’s amazing and easy to use drag and drop feature. No coding knowledge whatsoever is required at all!
Besides, the form element customization options enable you to make your WP contact form or any other form more unique and beautiful. You can change colors, paddings, form-field size, text size and many more.
Creating Contact Form with Pre-built Template in Forminix
First of all we will show you how you can use a pre-built template in Forminix for making your contact form in a click.
Step 1: After installing the plugin on your WordPress site, go to the Forminix plugin page from your admin panel.
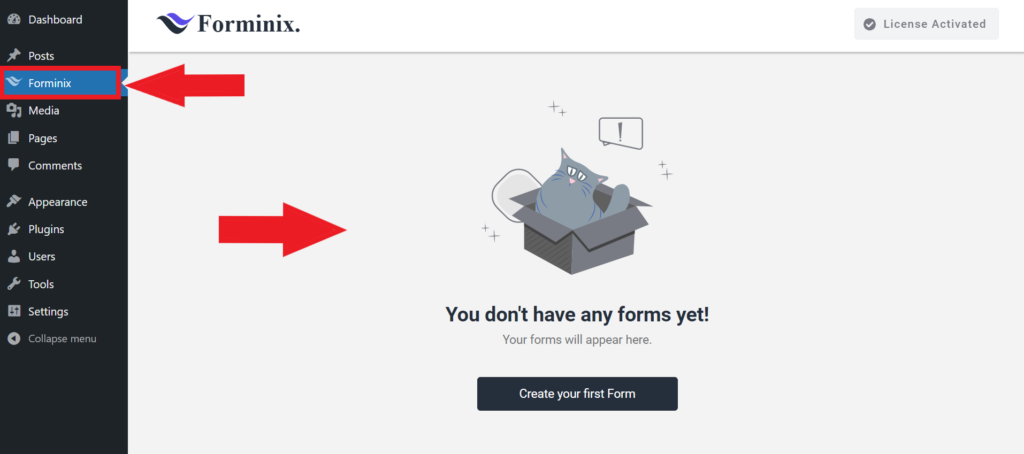
Step 2: After that, click on the “Create your first Form” button on the page. A pop up will appear from where you can see several pre-built templates along with the manual form building option.
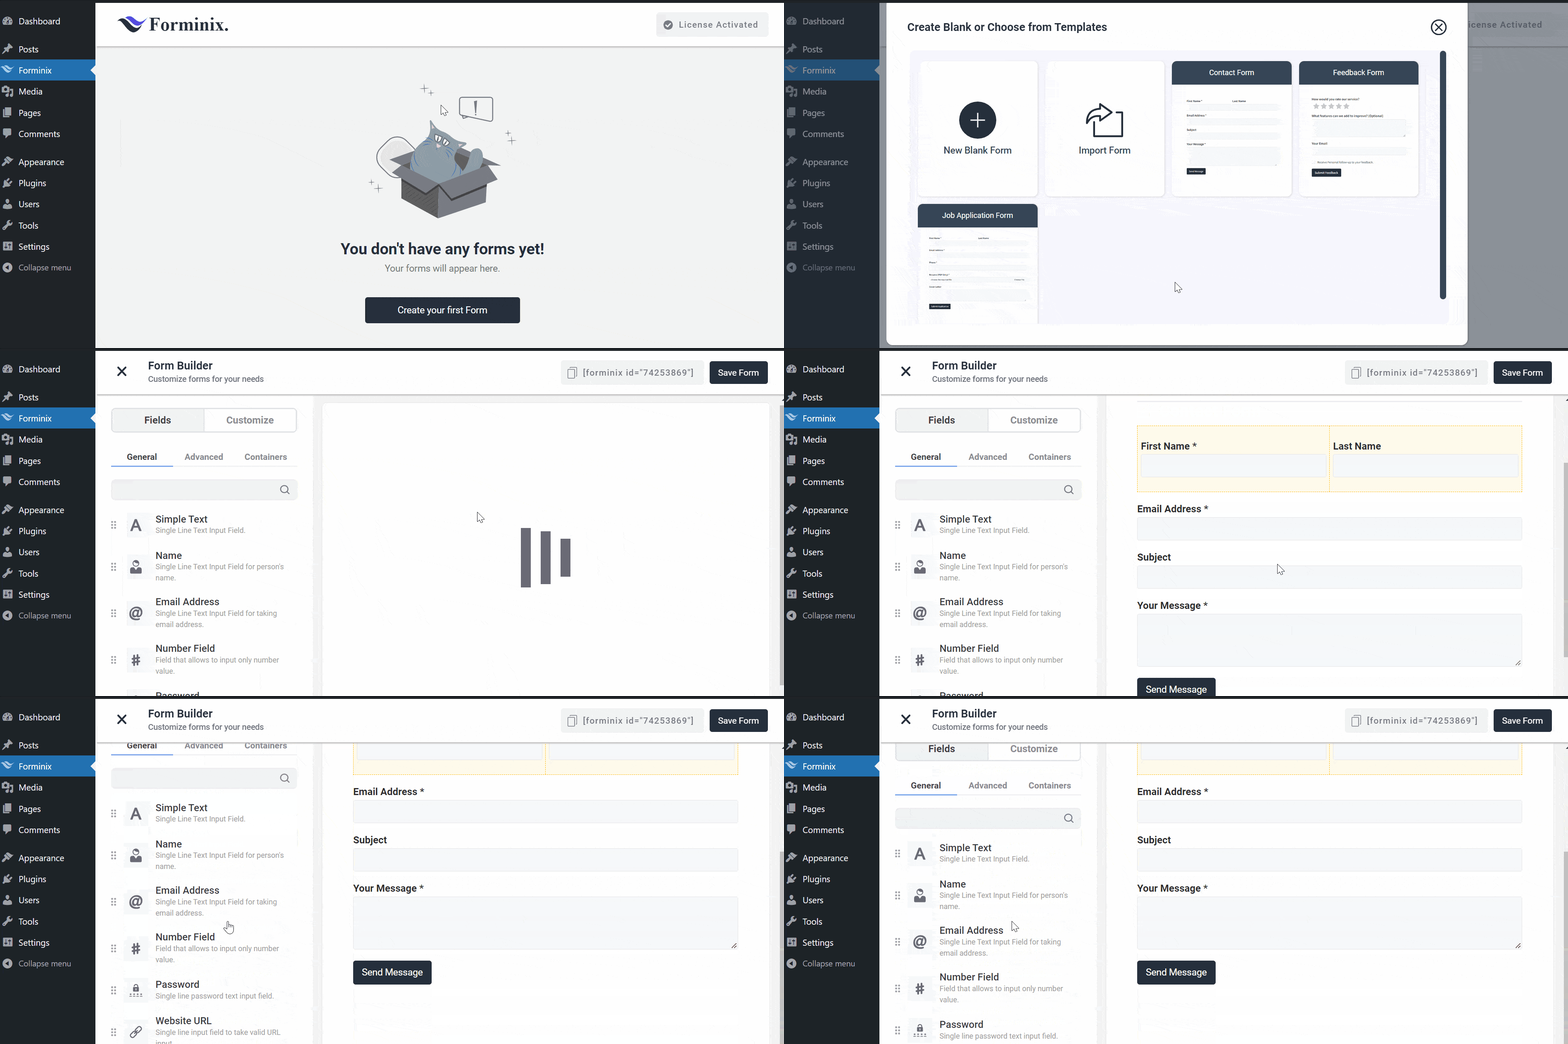
Click on the “Contact Form” template and it will be imported directly within seconds. Then you can see the contact form and the form fields.
The template comes with some basic fields that you can fully customize according to your need. On the left hand panel you can see all sorts of customization options available.
You can add or remove fields, change their colors, change texts, colors and size, adjust paddings and what not. A whole list of options for you to explore in there.
Step 3: After you are done making your changes and adjustments, click the “Save Form” button on the top right corner as shown below. Your WP contact form will be saved.
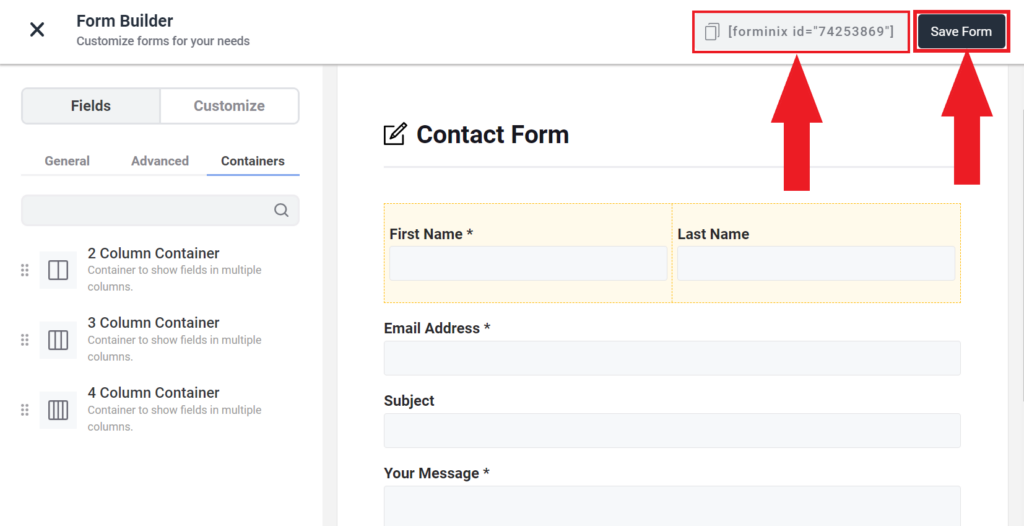
Step 4: Now finally to be able to use your contact form, Forminix gives you shortcode option to post on any page of your site. Simply click on the shortcode shown beside the “Save Form” button and it will be copied to your clipboard.
Step 5: Place the copied shortcode in your desired webpage as shown below.
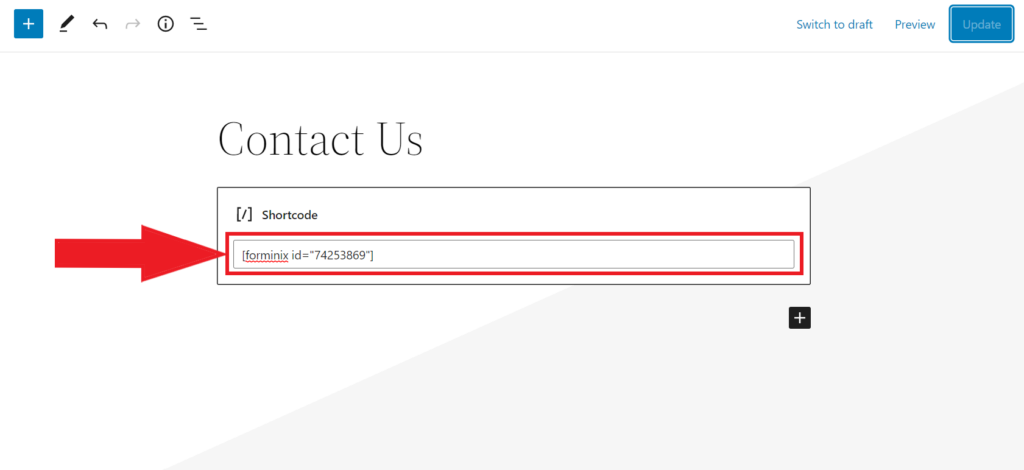
Afterwards, update your page and your WP contact form will be ready to go.
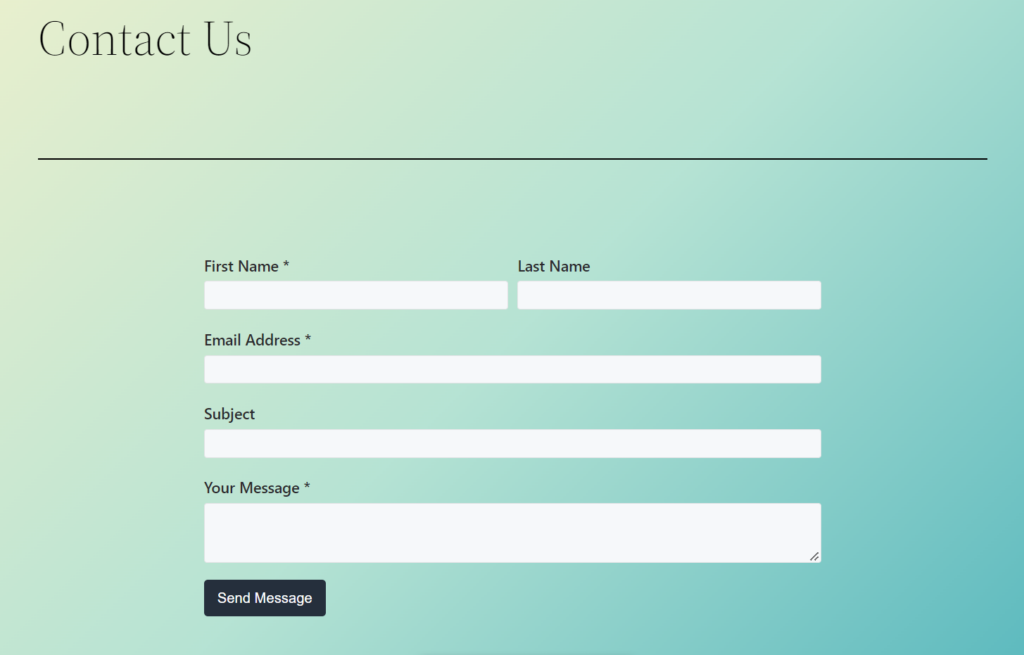
Creating Contact Form using Manual Drag and Drop
Now we will take you through the manual drag and drop process of building your contact form from scratch.
Don’t worry as it is not a hard nut to crack, the overall procedure is rather simple and you can build and customize each and every element according to your need. So, lets take a look.
Step 1: Simply click on the “Create your first Form” button on the plugin’s main page as you have seen in the previous method.
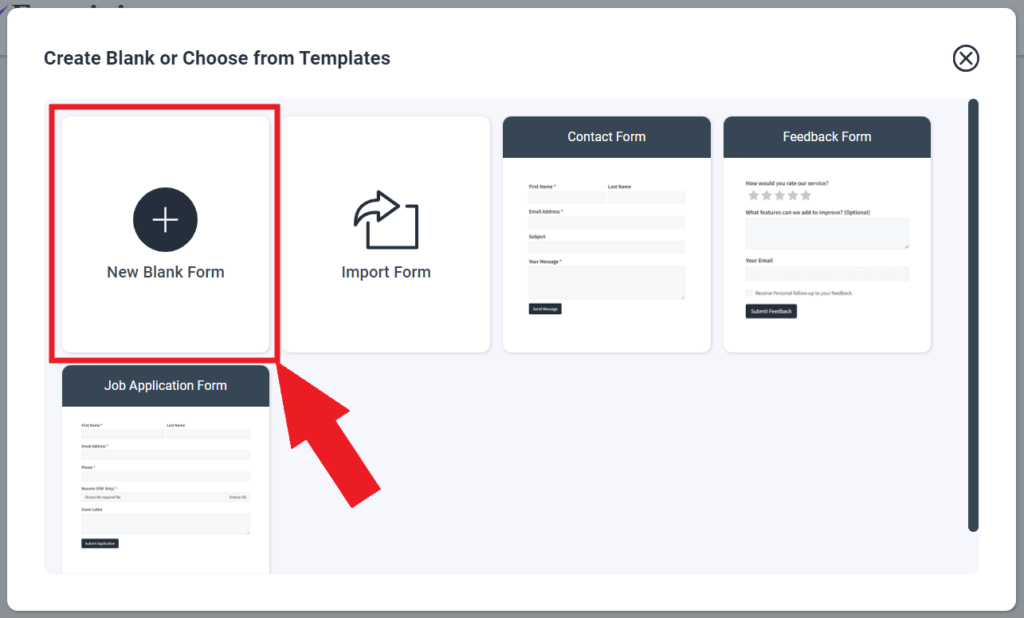
Step 2: Then click on the “New Blank Form” option and it will open up a new page for you to start your form building.
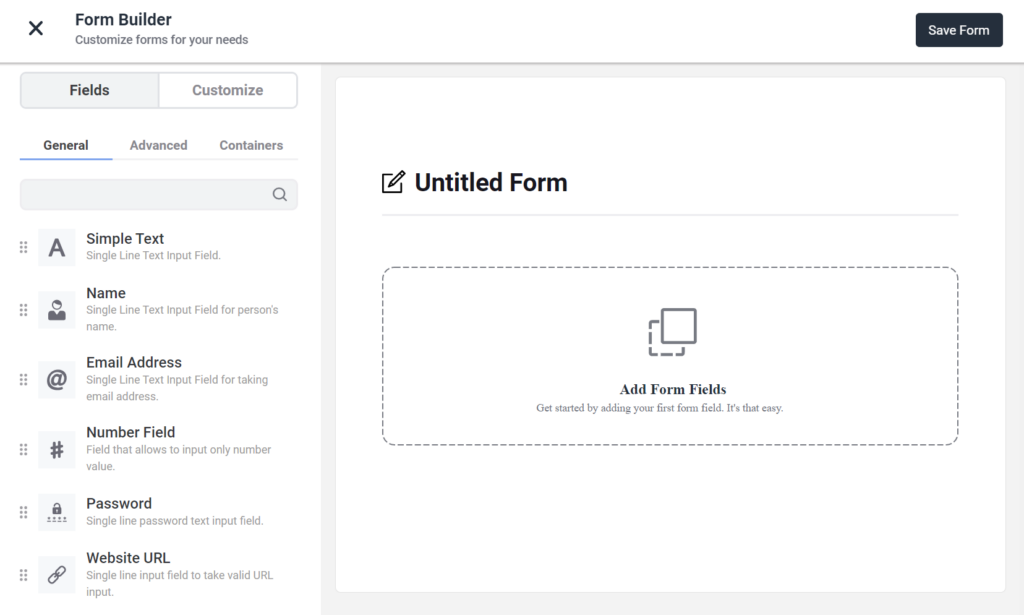
Step 3: You can change your form name in here. Moreover, easily drag and drop any field you want from the left hand panel as shown below. Then hit the “Save Form” button on the top right corner as usual and your form will be saved.
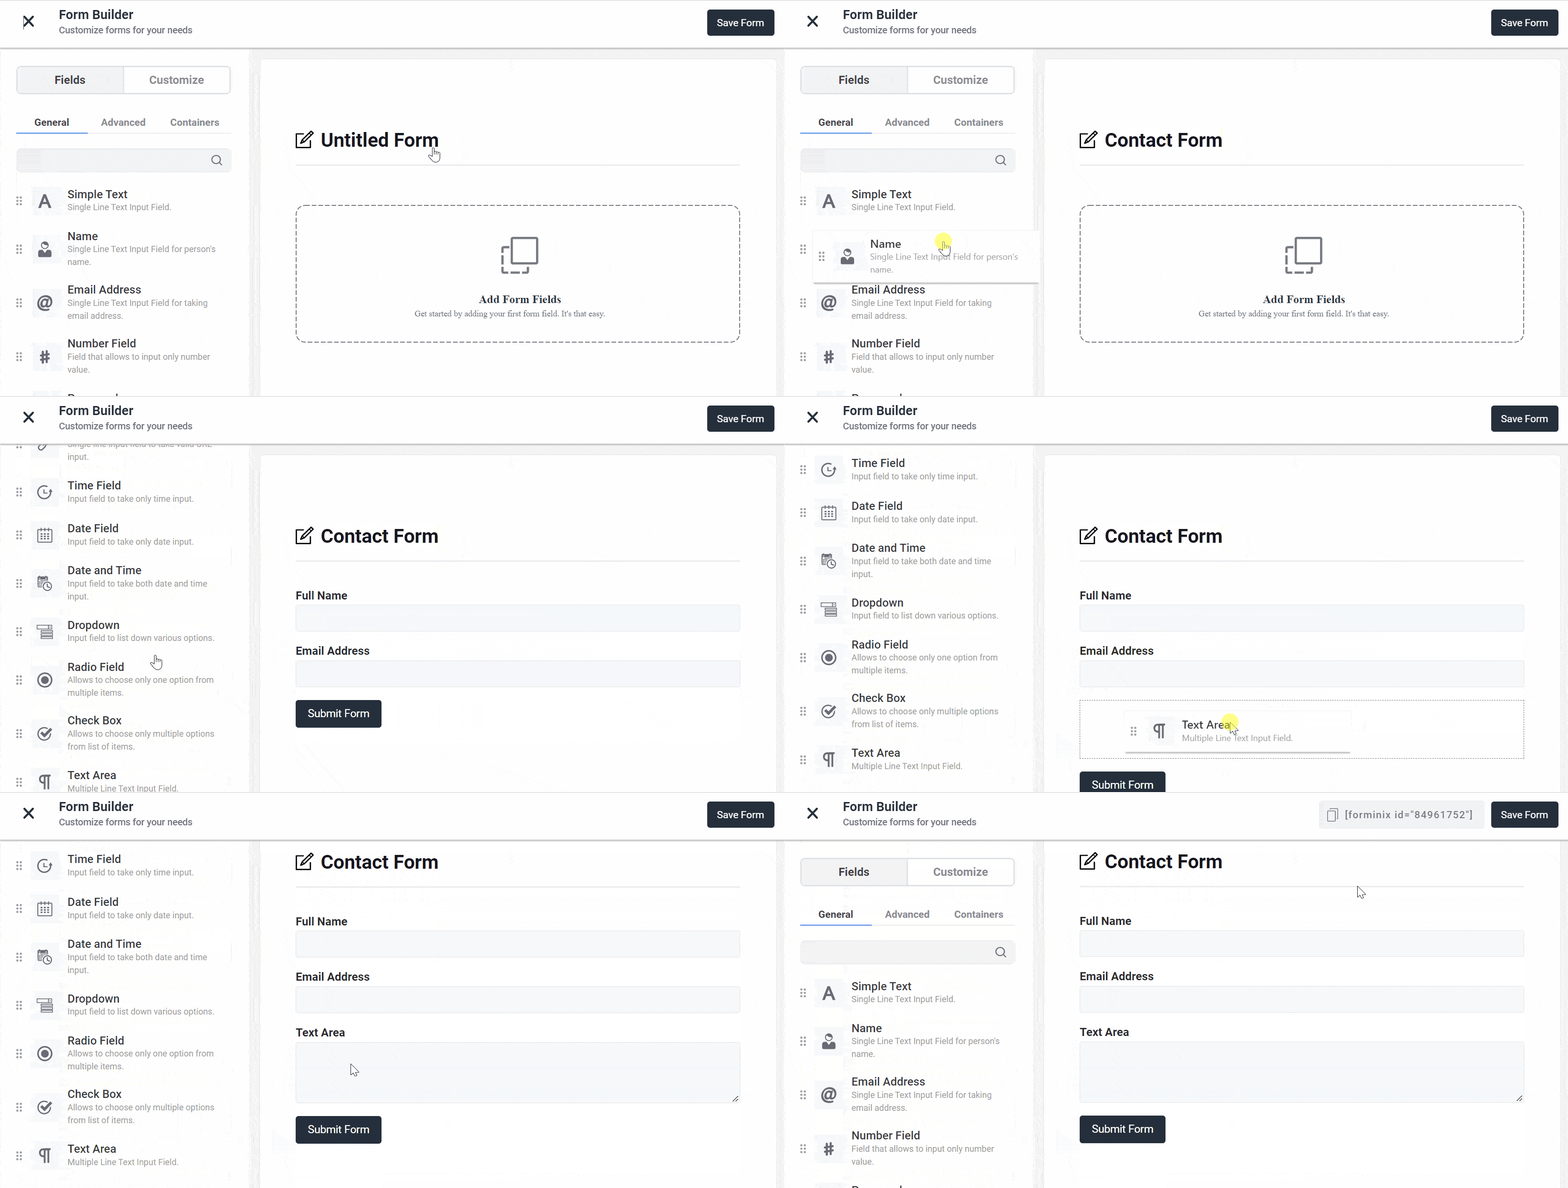
Step 4: If you want to fully customize the text fields, simply click on any field and you will get all the customization options on the left hand panel like this.
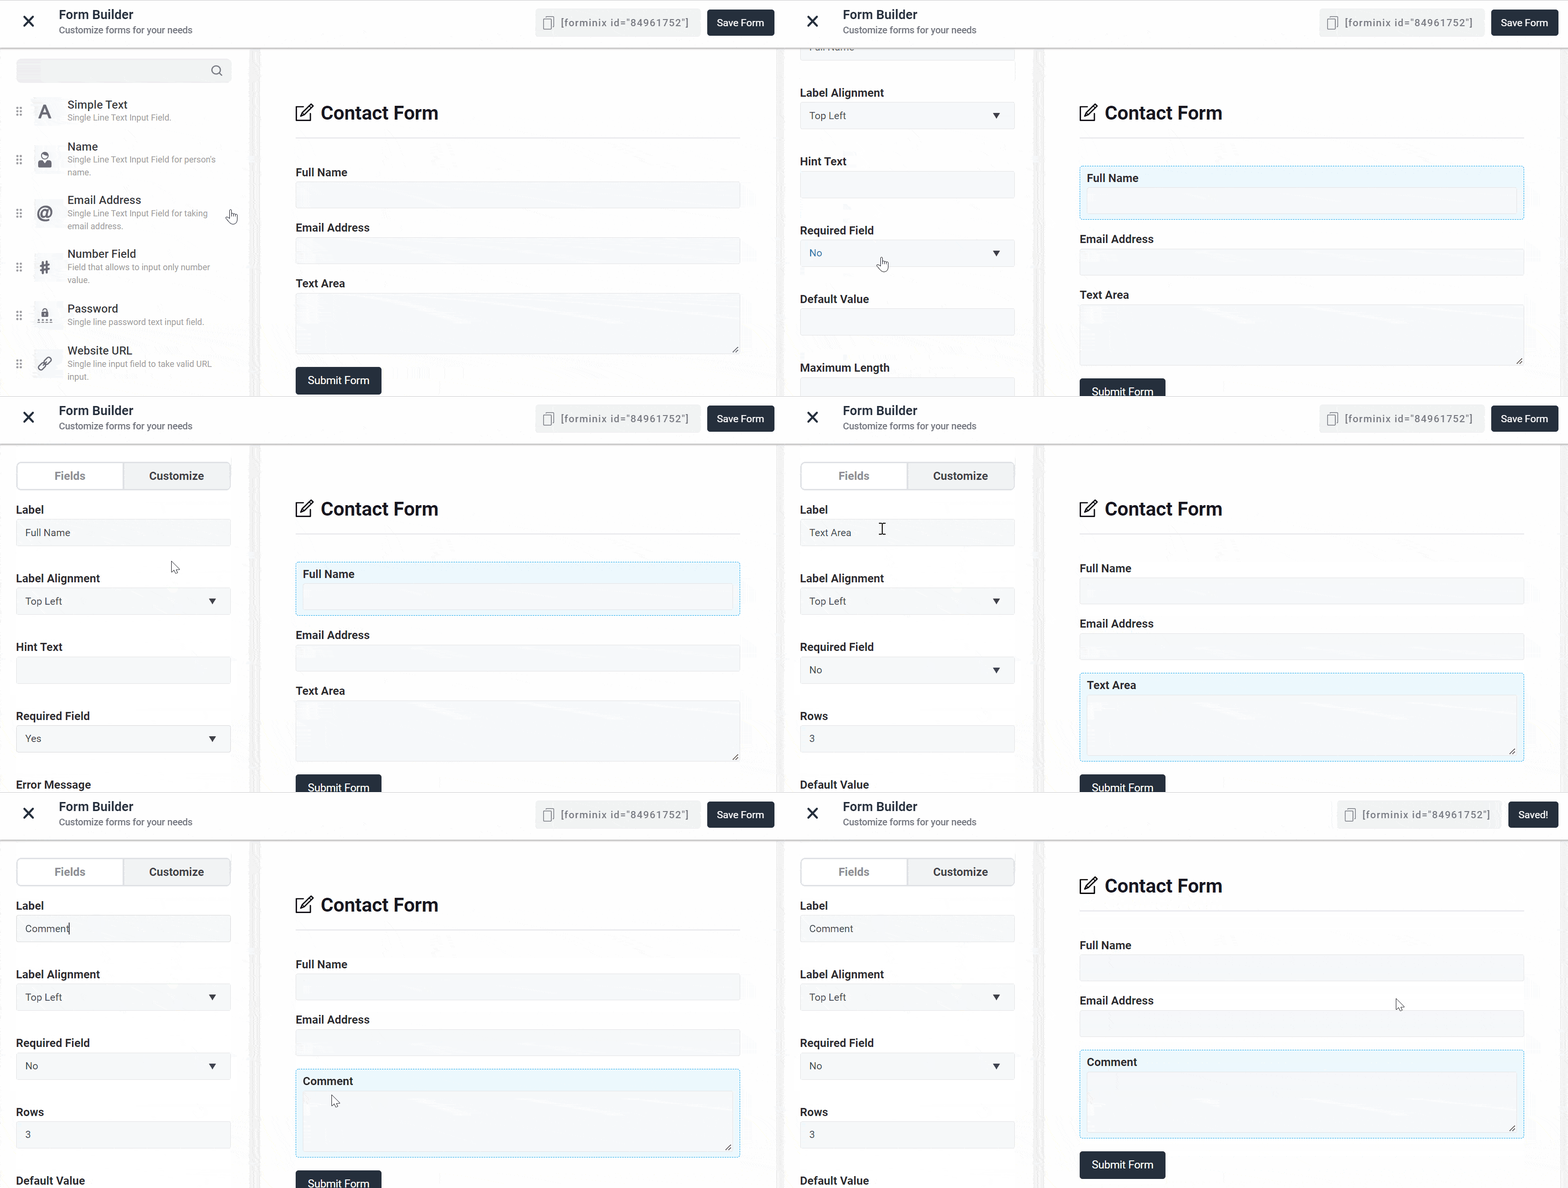
You can change the names of your form fields, change their label alignment, make them “Required“, set error message, hint text, help message and much more. Scroll down on the left panel for more options.
After making all your changes and customization, don’t forget to click on the “Save Form” button. So, now you know how to build WordPress forms within few clicks.
Final Words
We hope that in this tutorial you have learned the easy and simple methods of building any type of contact form using Forminix WordPress form builder plugin.
Explore this amazing tool and create WP forms in no time. Carefully follow the instructions mentioned above before you start.
Leave your comments down below and share your feedbacks with us.


